Author: Home Finds Studio

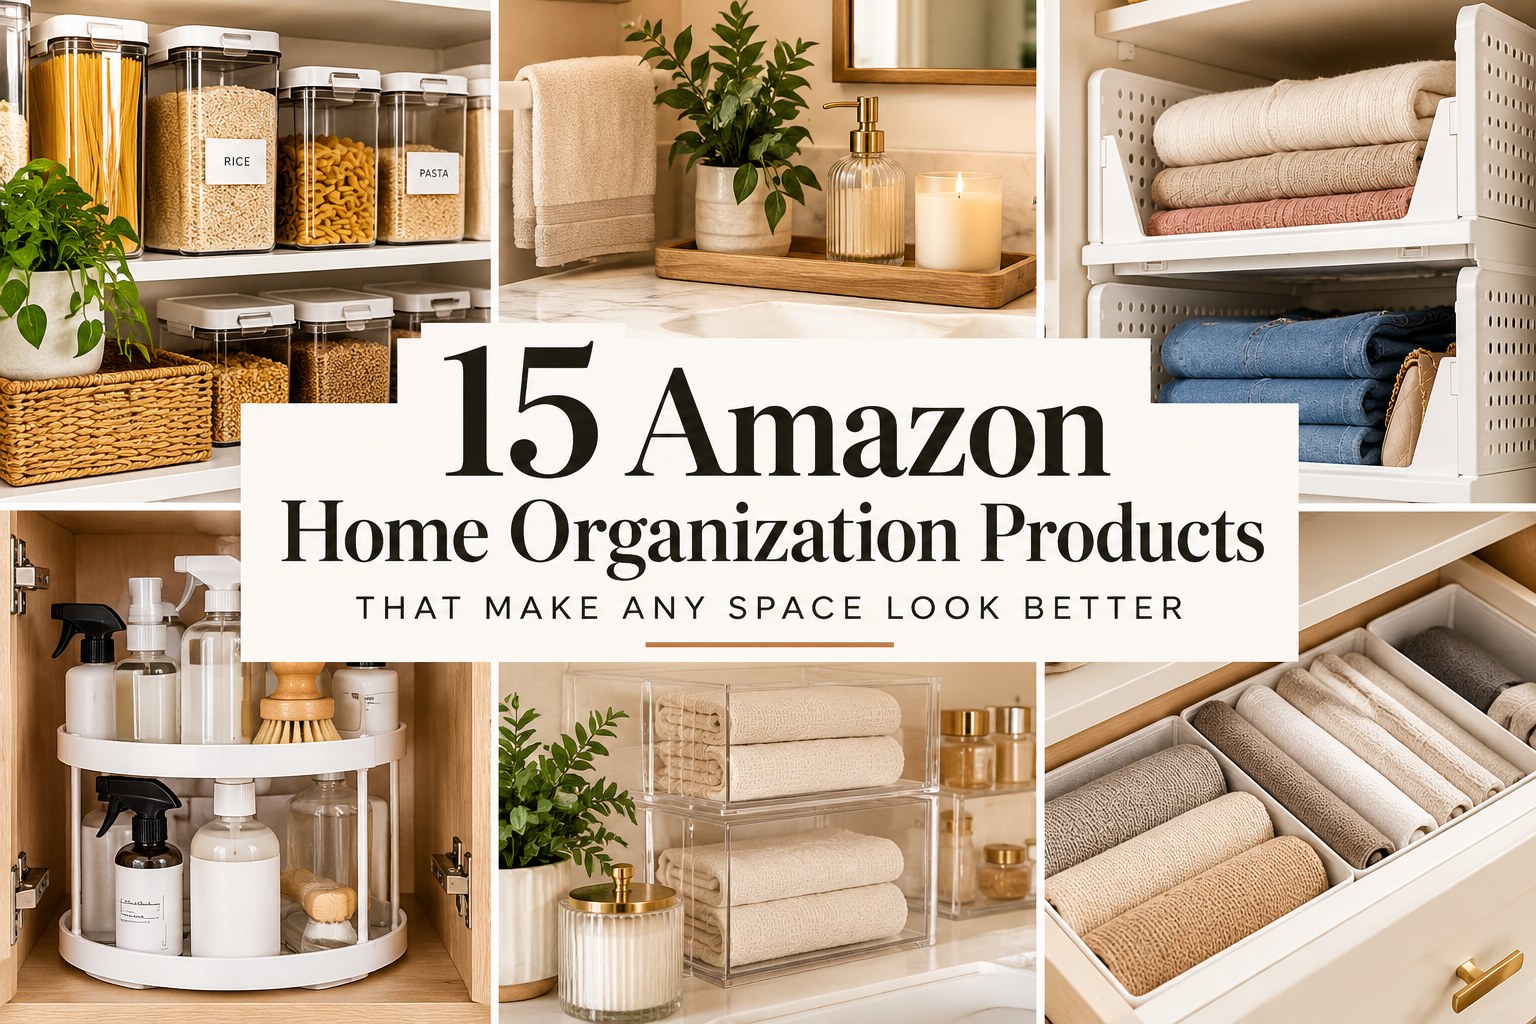
  • 15 Amazon Home Organization Products That Make Any Space Look Better

    15 Amazon Home Organization Products That Make Any Space Look Better

    This post contains affiliate links. I may earn a commission if you purchase through these links, at no extra cost to you.

    A home doesn’t have to be large or expensive to look polished. Often, the biggest difference comes from reducing visual clutter, making better use of storage, and giving everyday items a designated place.

    If your kitchen counters always feel crowded, your cabinets are difficult to organize, or your closets never seem to have enough space, the right home organization products can make everyday routines easier while helping your home look more put together.

    These 15 Amazon home organization finds focus on practical solutions for kitchens, bathrooms, closets, and small spaces. Prices and availability vary by seller, size, and style, so check the current listing before purchasing.

    This post contains affiliate links. If you purchase through these links, I may earn a commission at no additional cost to you. As an Amazon Associate I earn from qualifying purchases.

    1. Under-Sink Organizers That Double Your Storage Space

    The area beneath a kitchen or bathroom sink can quickly become a jumble of cleaning supplies, toiletries, and miscellaneous items. A two-tier under-sink organizer helps create separate levels, making products easier to see and reach.
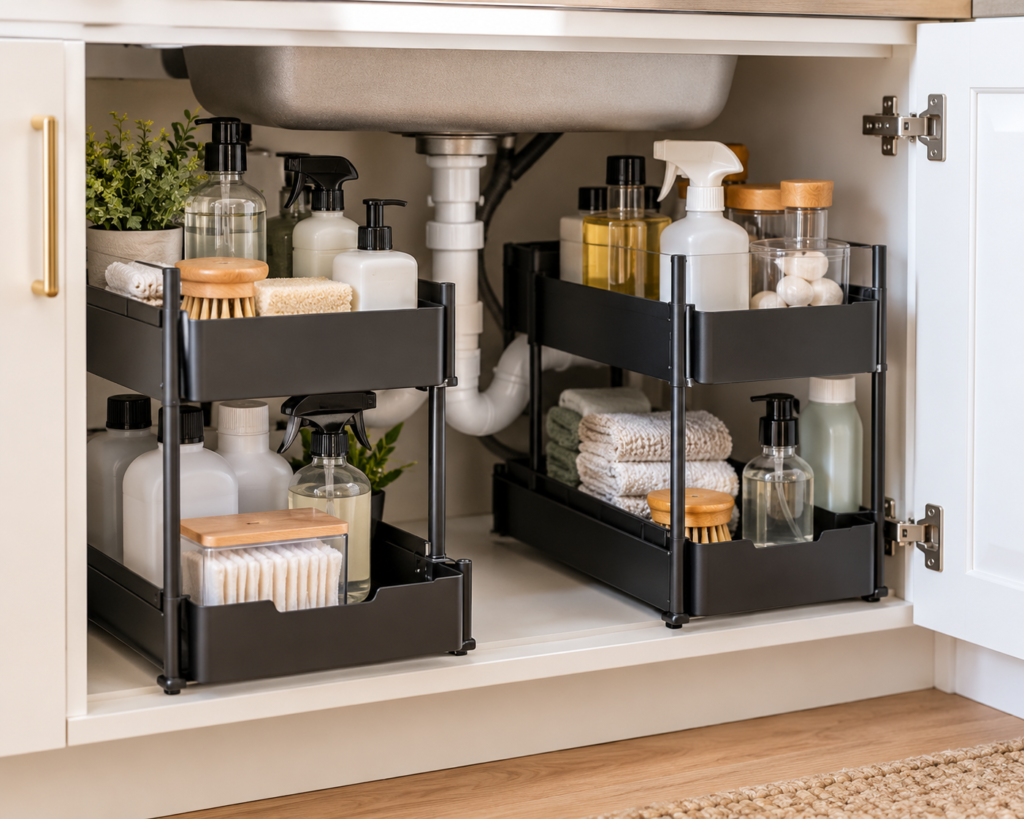
    Two black two-tier organizers under a kitchen sink holding cleaning supplies, soap bottles and folded towels

    Why it’s useful: It makes better use of vertical space instead of leaving items stacked on top of one another.

    What to look for:

    • Adjustable or removable shelves to accommodate pipes
    • Pull-out drawers for easier access
    • Sturdy, moisture-resistant construction
    • Dimensions that fit your cabinet

    Best for: Kitchen sinks, bathroom vanities, and crowded cleaning cabinets.

    View the Under-Sink Organizer on Amazon


    2. Expandable Drawer Dividers for a More Organized Kitchen

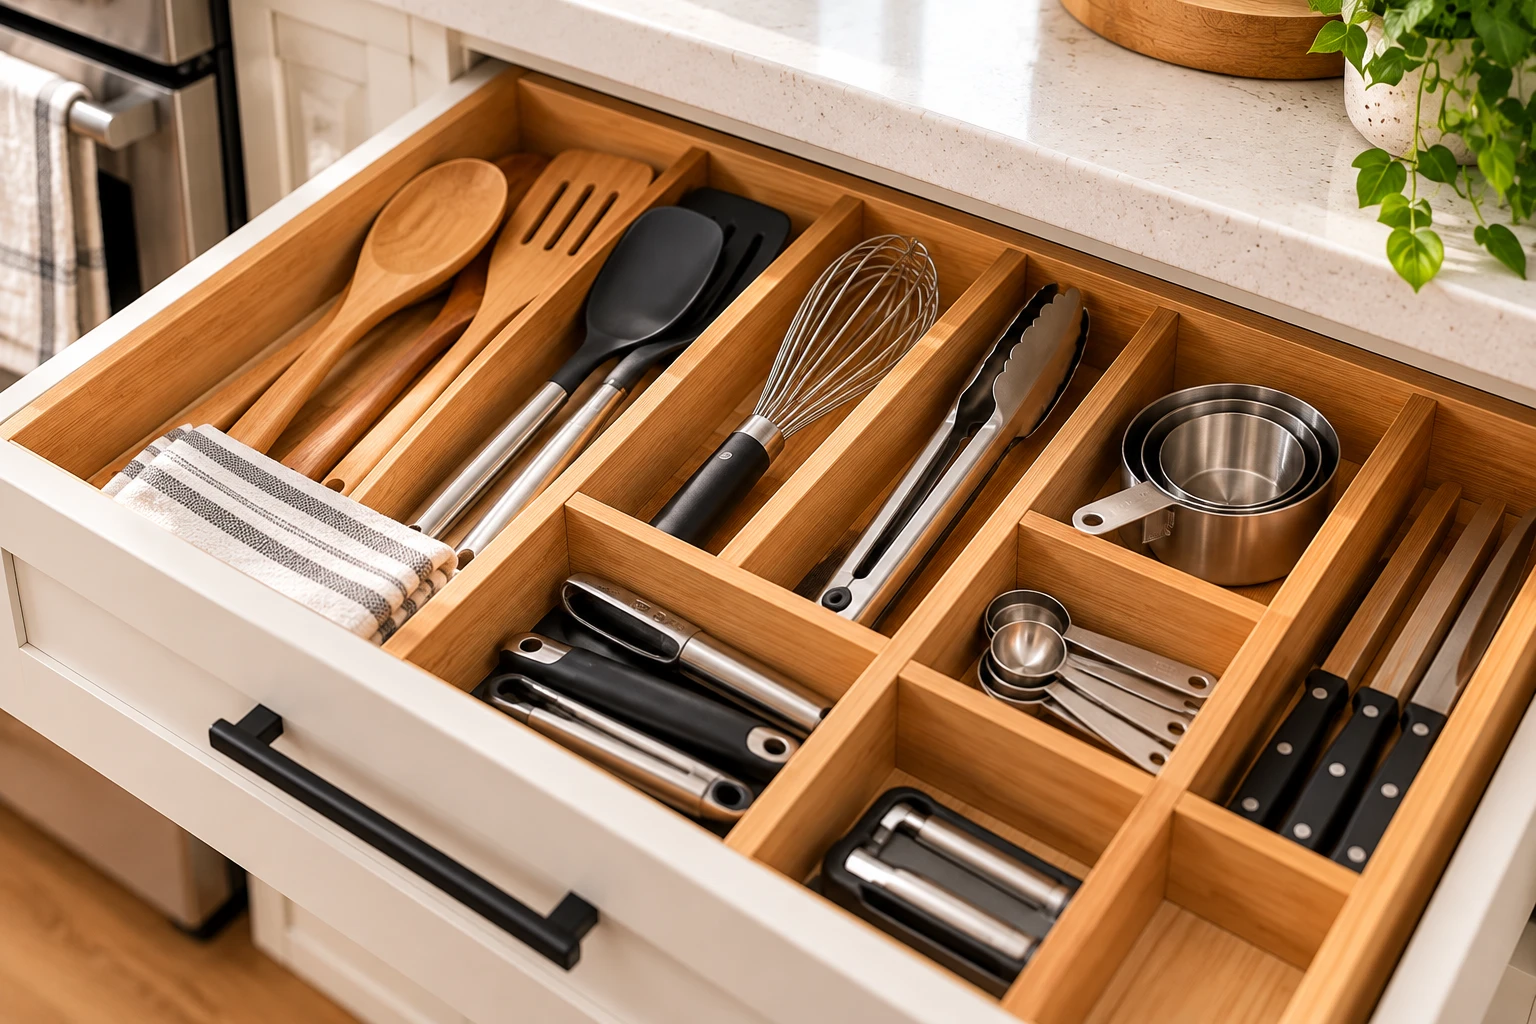
    If your utensil drawer becomes messy every time you open it, expandable dividers can help keep cooking tools separated. Use them to organize spatulas, measuring spoons, serving utensils, and other kitchen essentials. The same type of divider can also work in bathroom or bedroom drawers.
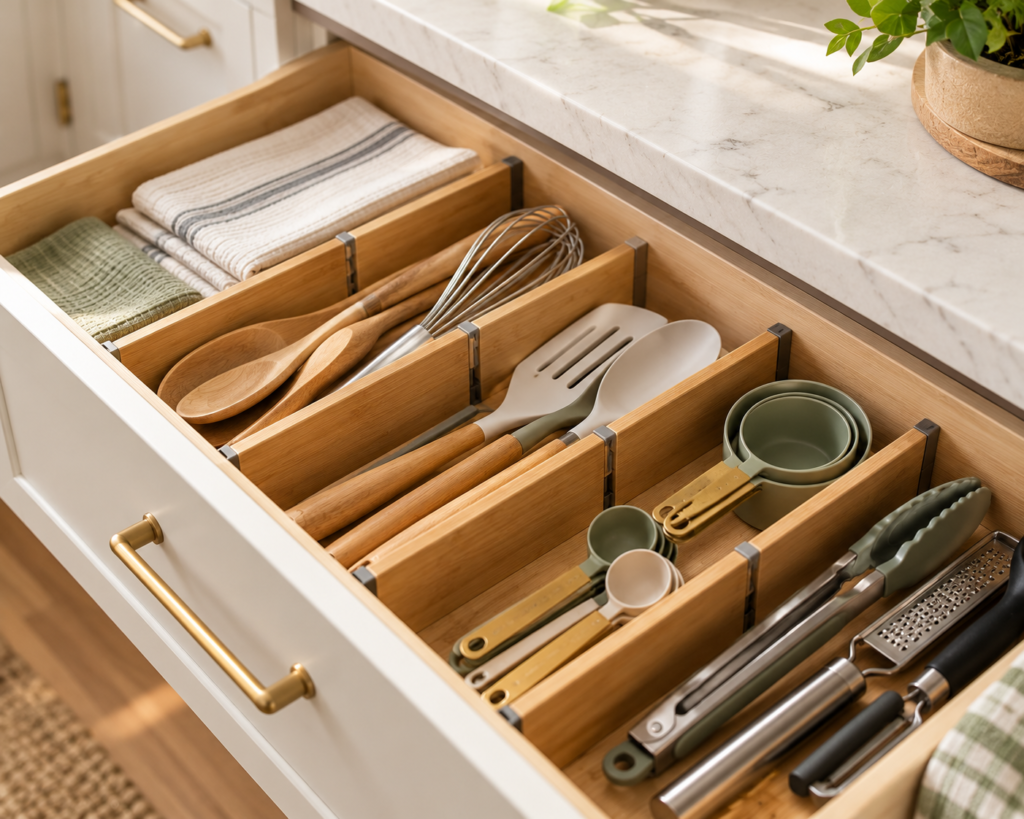
    Kitchen drawer with adjustable bamboo dividers separating wooden spoons, spatulas, measuring cups, tongs and dish towels

    Why it’s useful: Everything has a designated place, making it easier to find what you need without emptying the entire drawer.

    What to look for:

    • Adjustable lengths
    • Non-slip ends
    • A height that fits beneath the drawer’s closing clearance
    • Materials that are easy to wipe clean

    Best for: Kitchen utensils, bathroom essentials, and everyday accessories.

    View the Adjustable Drawer Dividers on Amazon


    3. Clear Refrigerator Storage Bins

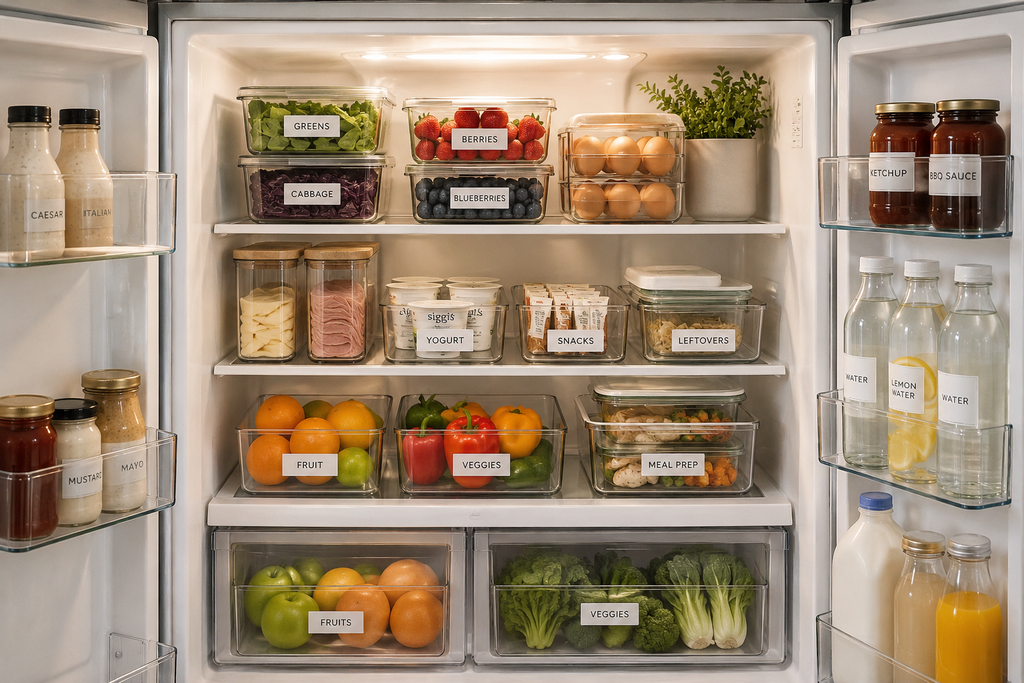
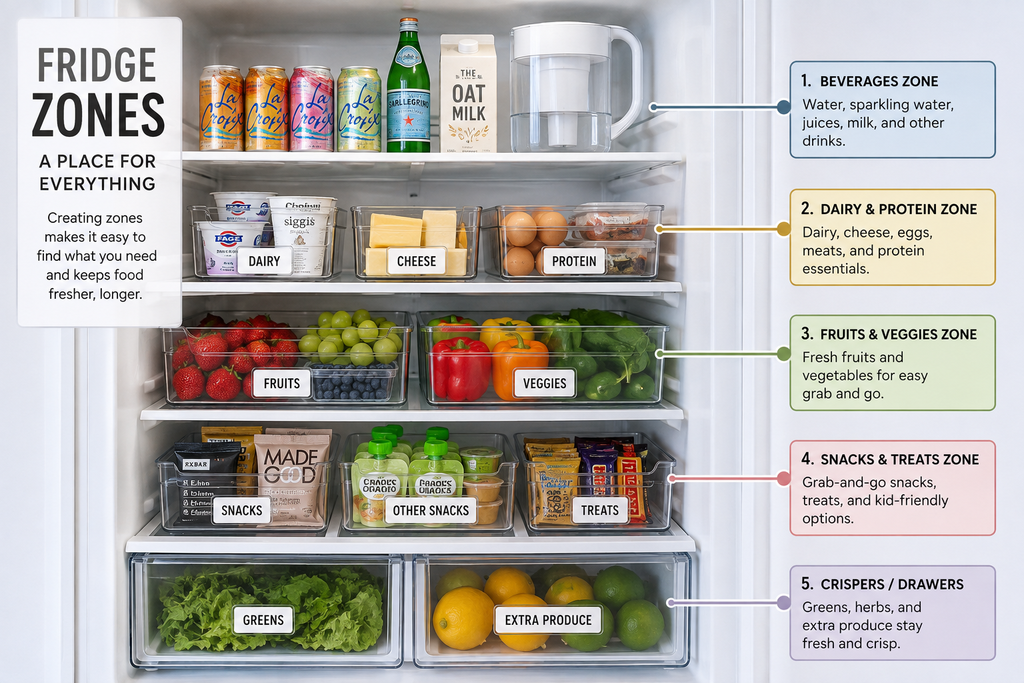
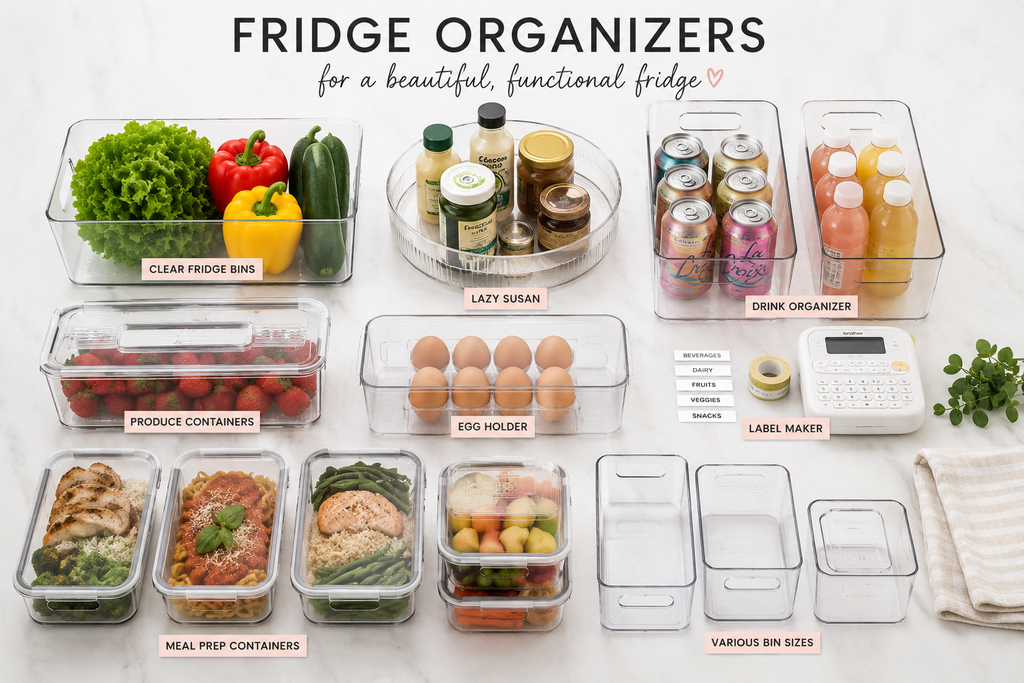
    A refrigerator can look cluttered even when it contains relatively few items. Clear storage bins help group similar foods together and make it easier to see what you already have. Use separate bins for yogurt, snacks, condiments, or packaged ingredients. Choose sizes that fit your shelves without blocking airflow.
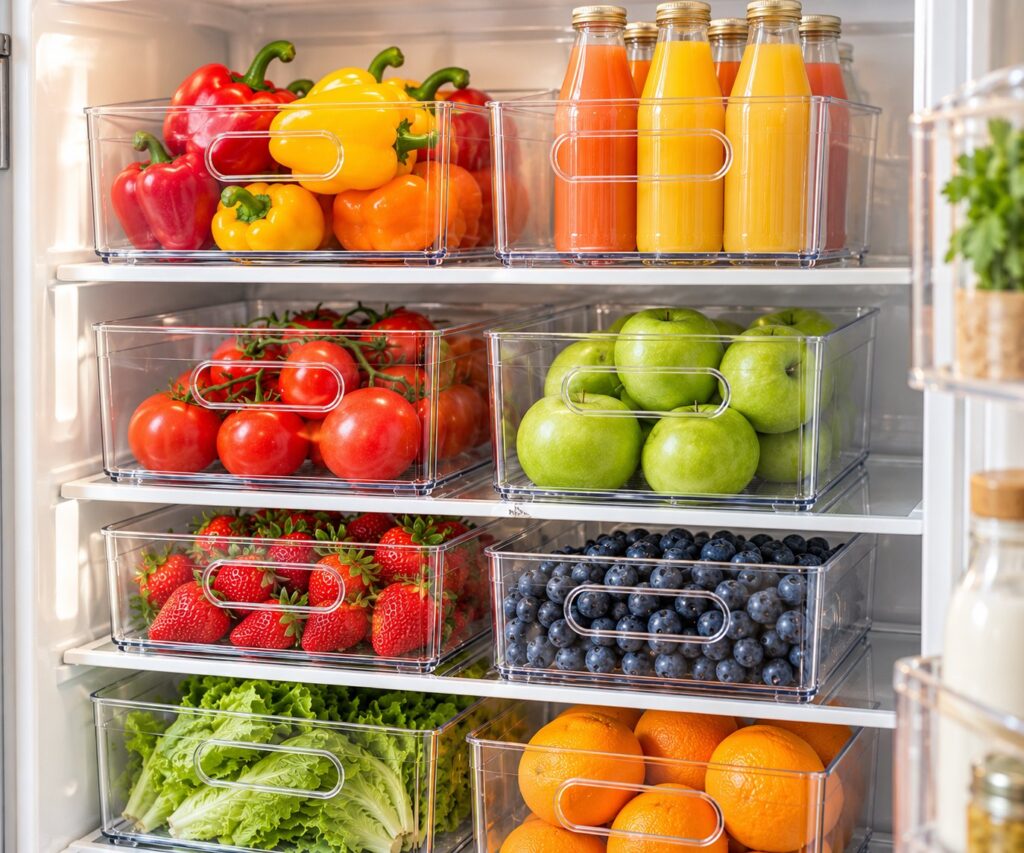
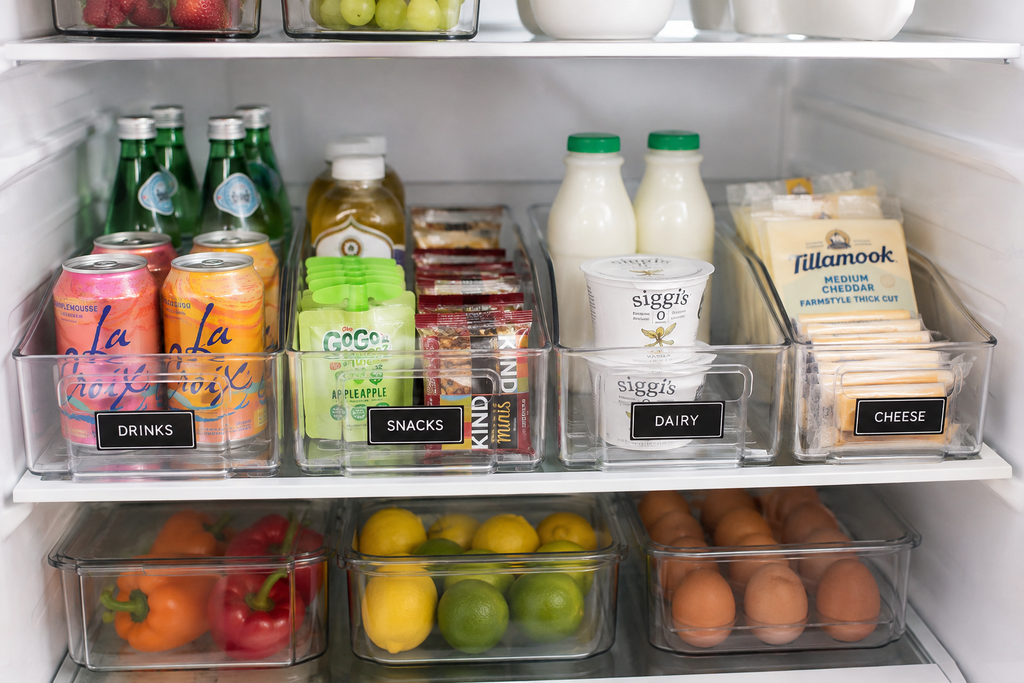
    Clear stackable refrigerator bins on fridge shelves filled with peppers, tomatoes, strawberries, blueberries, apples and juice bottles

    Why it’s useful: Grouping items makes everyday food easier to find and can help you notice food that needs to be used before it expires.

    What to look for:

    • Clear, food-safe materials
    • Handles for easy removal
    • Sizes that fit your refrigerator shelves
    • Easy-to-clean surfaces

    Best for: Busy families, weekly meal preparation, and crowded refrigerators.

    For more practical ideas, read our guide to fridge organization and ways to make your refrigerator look more organized.

    View the Clear Refrigerator Organizer Bins on Amazon


    4. Stackable Pantry Storage Bins

    Pantry shelves often become difficult to manage when snacks, packets, and small food packages are mixed together. Stackable bins help create defined storage zones and use vertical space more efficiently. Group breakfast foods, baking supplies, snacks, or individually packaged items in separate containers.
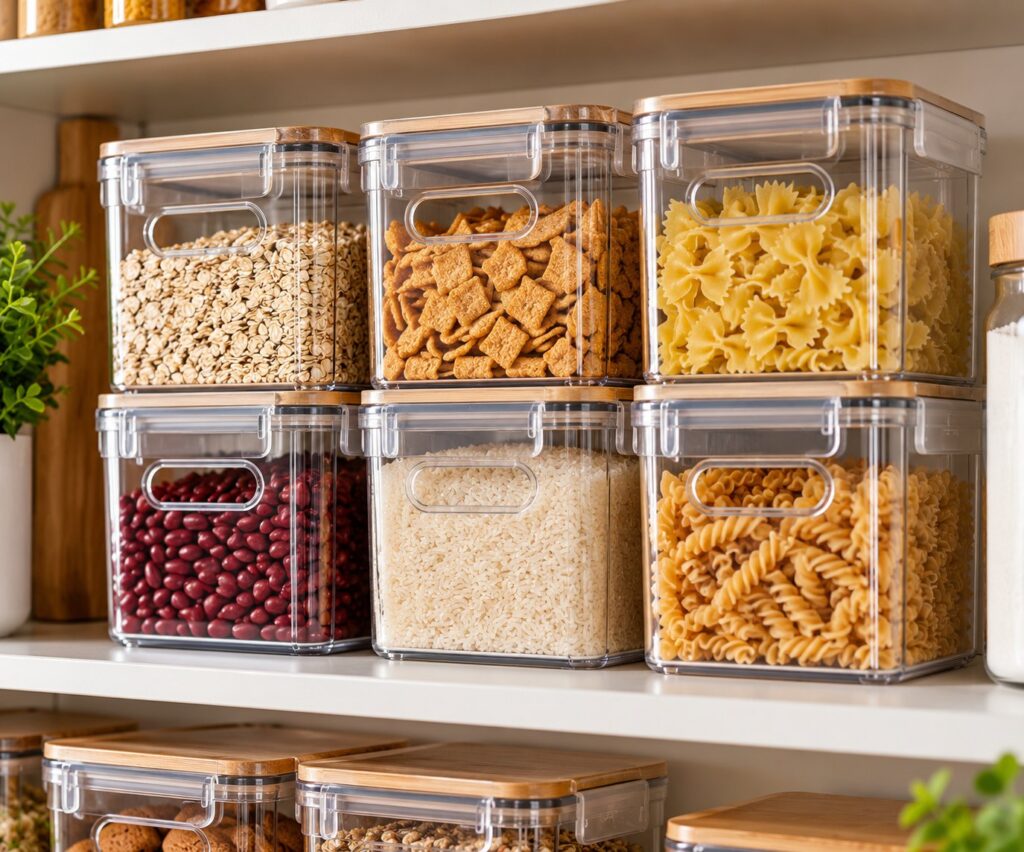
    Clear stackable pantry bins with handles holding cereal, pasta, rice and snacks on a bright pantry shelf

    Why it’s useful: You can see categories at a glance instead of searching through several half-open packages.

    What to look for:

    • Stackable designs that fit your shelf height
    • Open handles for easy access
    • Durable, easy-to-clean materials
    • Sizes suited to the products you store

    Best for: Small pantries, kitchen cabinets, and snack stations.

    View the Stackable Pantry Storage Bins on Amazon


    5. Foldable Storage Bins With Lids

    Foldable storage bins with lids, like these Homsorout bins, are a flexible way to organize closet shelves, open shelving, or a bedroom or other room. The lids help keep contents out of sight for a tidier look, and because the bins fold when you are not using them, they can be easier to store than rigid containers.
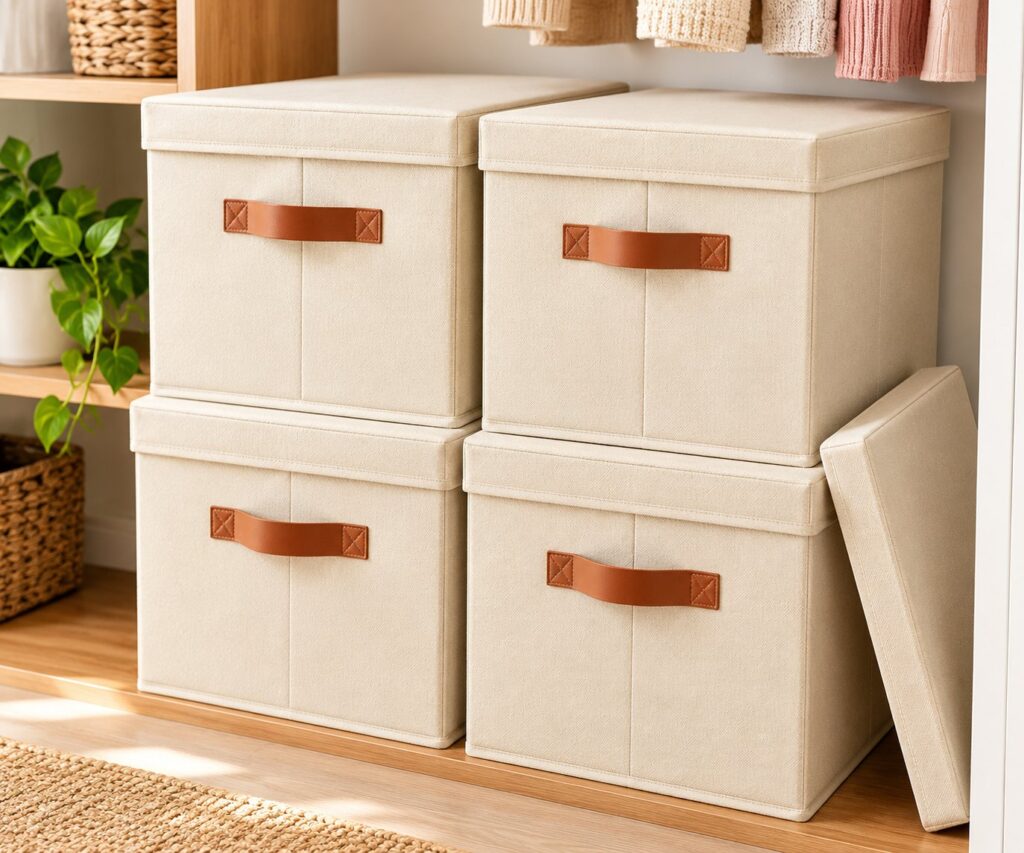
    Stack of cream fabric storage bins with lids and leather-look handles on a shelf in a bright room

    Why it’s useful: Lidded bins hide visual clutter and let you group similar items together on a shelf, in a closet, or in a room.

    What to look for:

    • Sturdy sides that hold their shape when filled
    • lids that fit securely
    • a size that fits your shelf or closet space
    • handles for easy carrying
    • fabric or material that is easy to wipe or spot-clean

    Best for: Closets, shelves, and bedrooms.

    View the Homsorout Foldable Storage Bins with Lids on Amazon


    6. Over-the-Door Organizers

    The back of a door is often unused space. An over-the-door organizer can provide additional storage without taking up floor space. Depending on the design, it can hold toiletries, pantry items, cleaning accessories, or small household supplies.
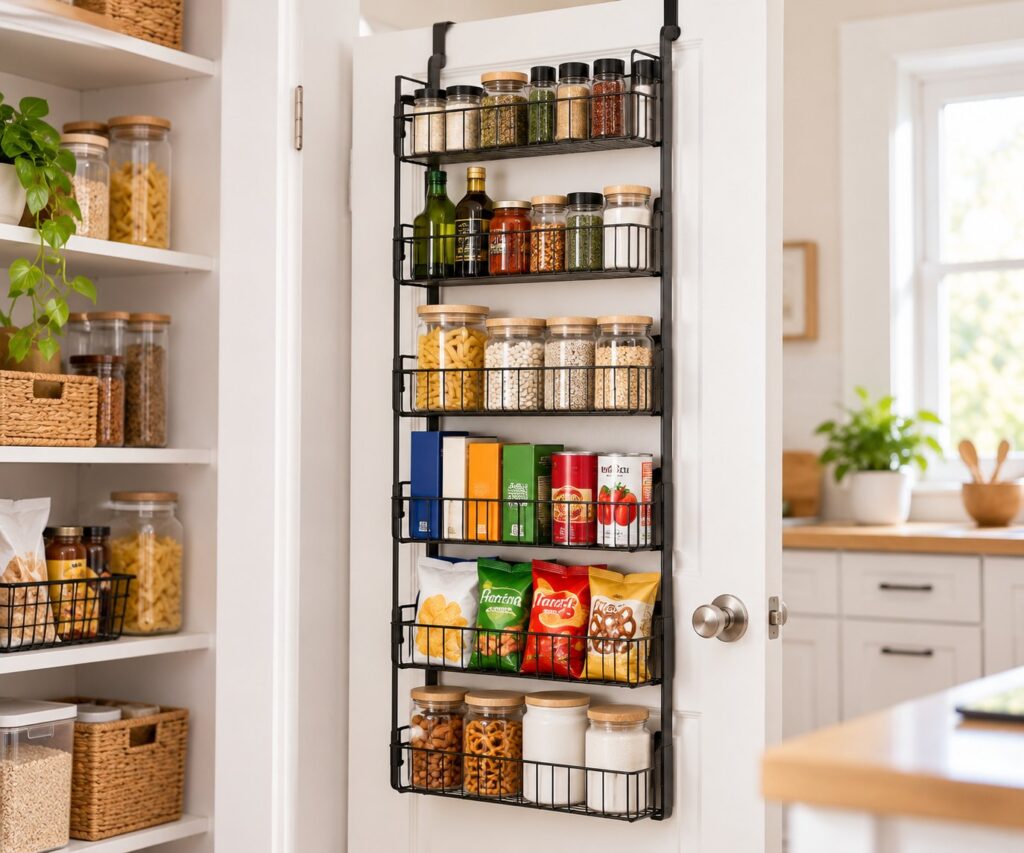
    Black over-the-door pantry rack holding spices, jars, boxes and snacks beside a pantry with open shelves

    Why it’s useful: It adds storage to an existing area without requiring another cabinet or shelving unit.

    What to look for:

    • Adjustable shelves or pockets
    • A door-compatible hanging system
    • Enough clearance for the door to close
    • A weight limit appropriate for your items

    Best for: Bathrooms, pantries, laundry rooms, and small apartments.

    View the Over-the-Door Pantry Organizer on Amazon


    7. Kitchen and Pantry Shelf Risers

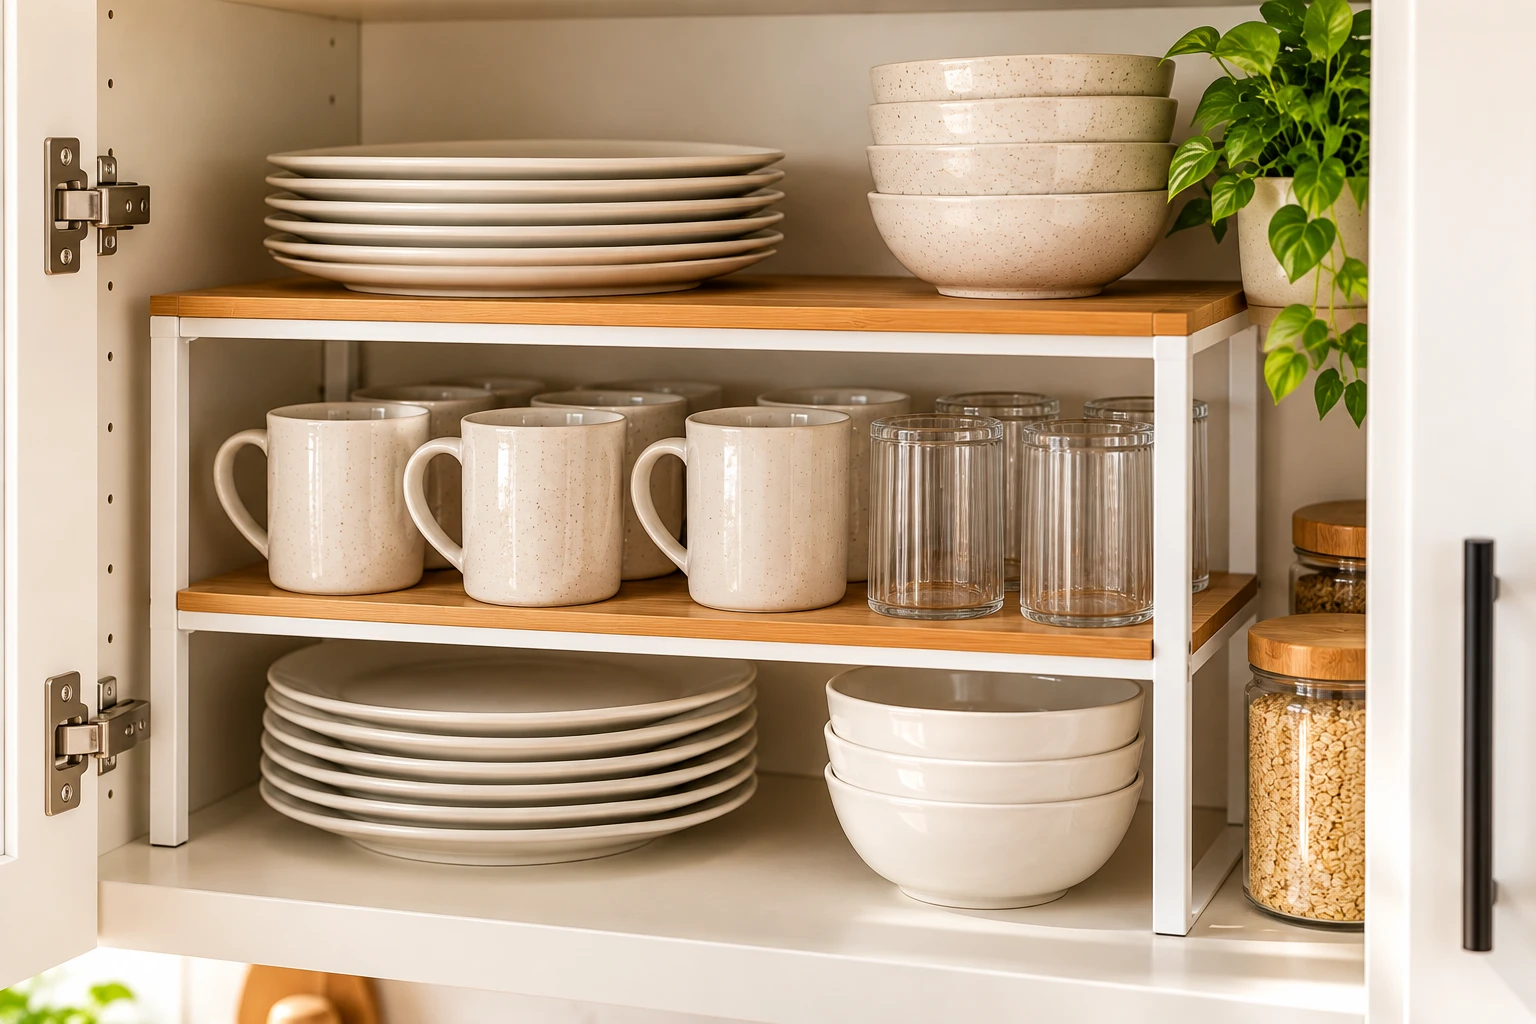
    Short cabinets and tall shelves can leave unused space above plates, mugs, bowls, and pantry items. Shelf risers create another level so you can organize more without stacking everything precariously.
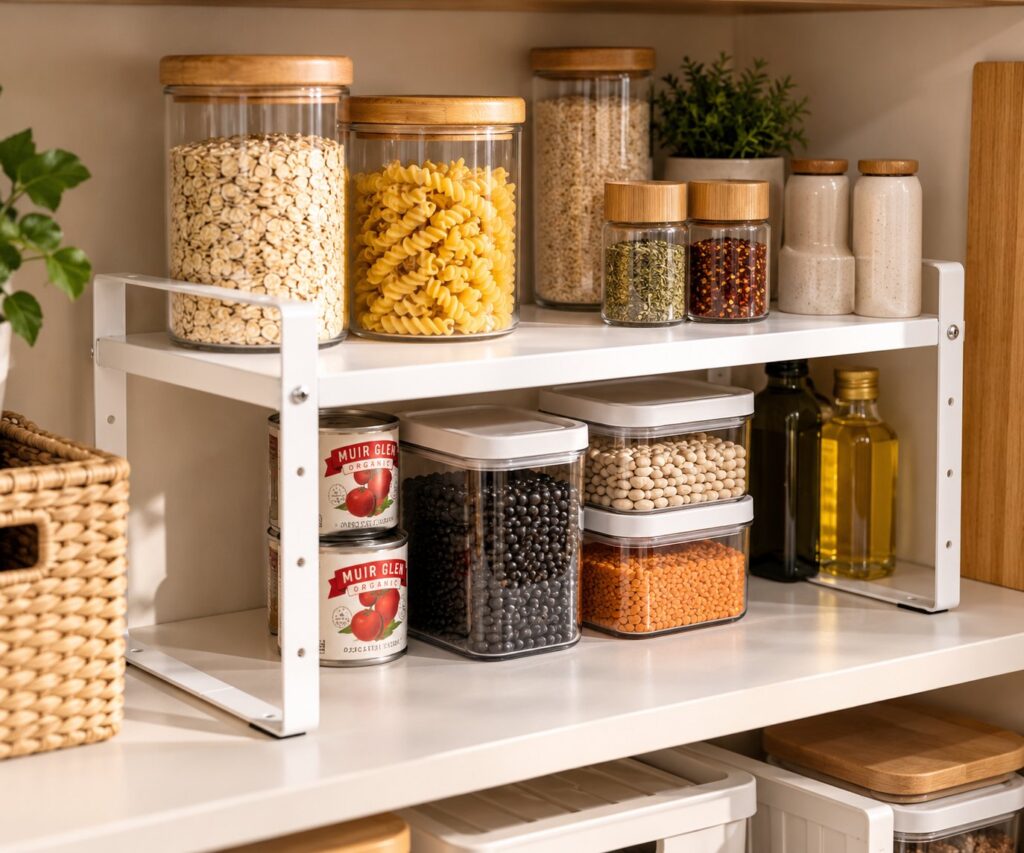
    White adjustable two-level pantry shelf riser holding glass jars of oats and pasta, spice jars, canned tomatoes and containers of lentils and beans

    Why it’s useful: It separates items into accessible levels and makes better use of existing cabinet height.

    What to look for:

    • A stable frame
    • A suitable width and depth
    • A weight capacity that supports your dishes or containers
    • A design that fits the cabinet’s available height

    Best for: Kitchen cabinets, pantry shelves, coffee stations, and bathroom storage.

    View the Kitchen Pantry Shelf Riser on Amazon


    8. Drawer Organizers for Makeup and Bathroom Essentials

    Small bathroom products can quickly spread across the vanity. Drawer organizers help separate skincare products, makeup, hair accessories, and everyday essentials. Instead of buying a large organizer immediately, measure your drawer and choose a combination of compartments that fits your routine.
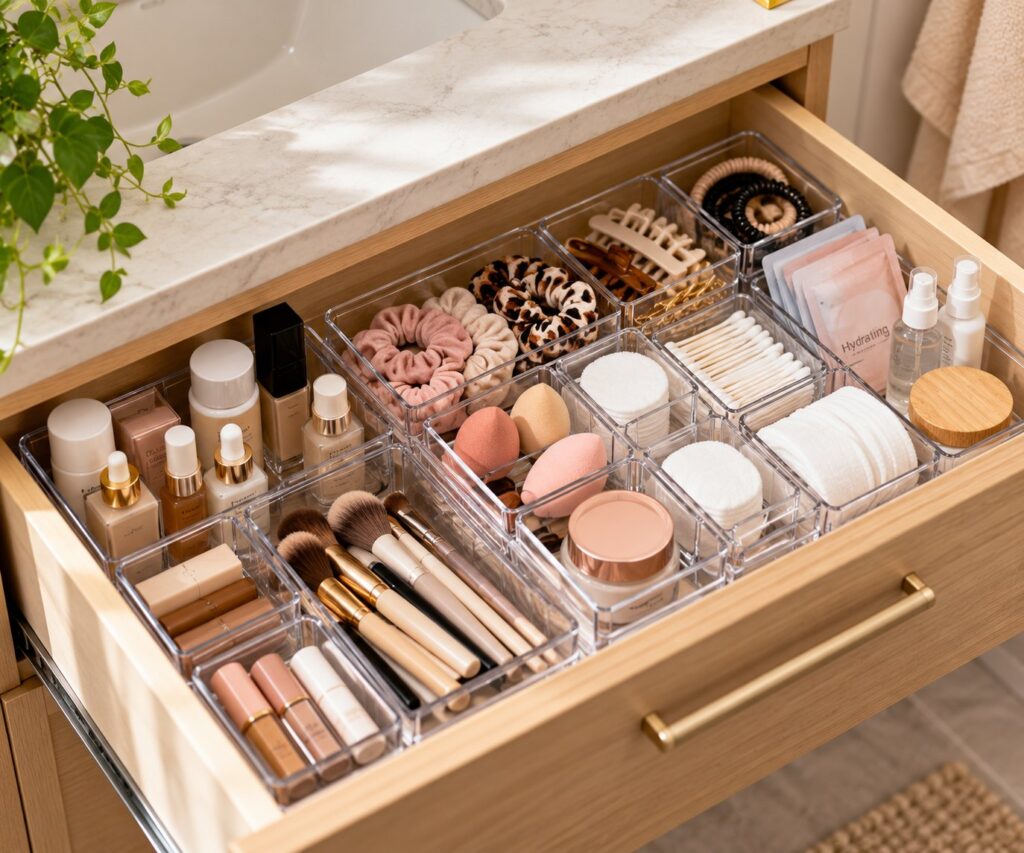
    Open bathroom drawer with clear compartment trays organizing makeup brushes, skincare, hair accessories and cotton rounds

    Why it’s useful: It reduces countertop clutter while keeping frequently used products easy to access.

    What to look for:

    • Different compartment sizes
    • Washable materials
    • Non-slip bases
    • Dimensions that fit your drawer

    Best for: Bathroom vanities, skincare storage, and makeup drawers.

    View the Makeup and Bathroom Drawer Organizers on Amazon


    9. Cable Management Boxes for Cleaner Surfaces

    Charging cables, extension cords, and power strips can make a desk, media console, or bedroom look messy. A cable management box conceals compatible power strips and excess cable length, helping the surrounding area look more organized.
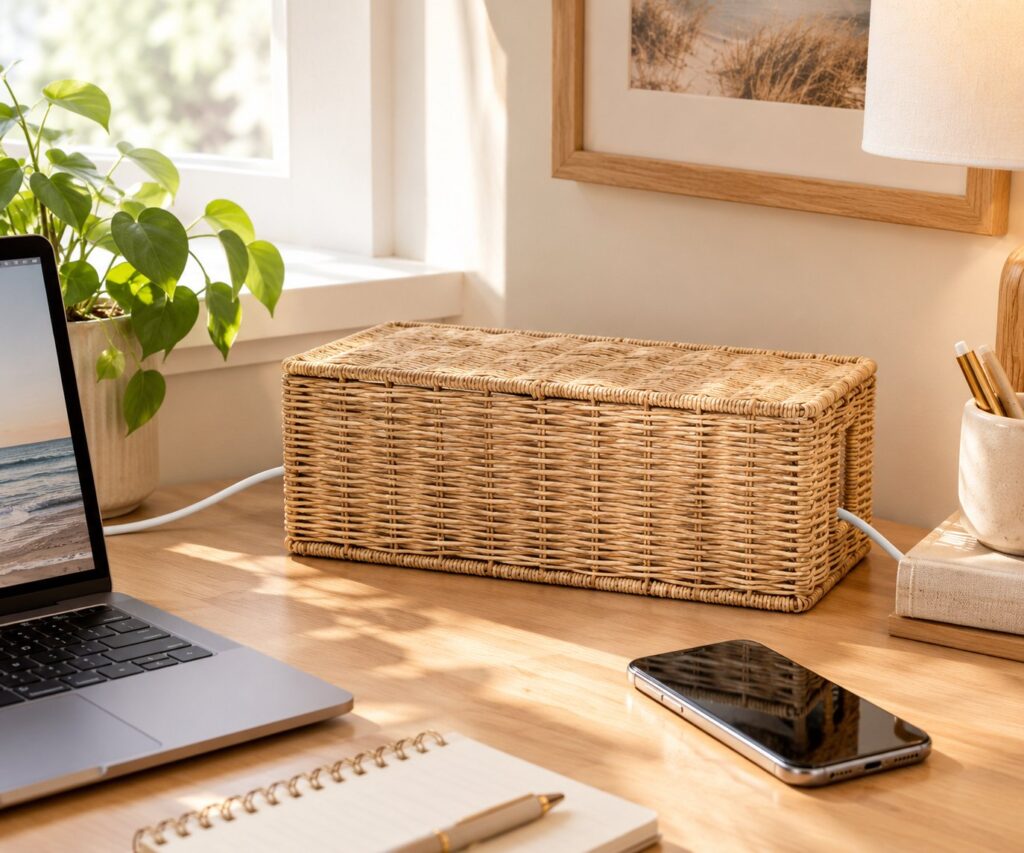
    Woven cable management box on a sunny desk beside a laptop and phone, concealing a power strip and cords

    Why it’s useful: It reduces visible cable clutter and makes surfaces easier to maintain.

    What to look for:

    • Enough space for your power strip and plugs
    • Ventilation openings
    • Openings that accommodate your cables
    • Heat-resistant construction suitable for the intended use

    Safety note: Never overload a power strip or place a cable box where heat cannot dissipate.

    Best for: Home offices, entertainment centers, and bedside charging areas.

    View the Cable Management Box on Amazon


    10. Matching Closet Hangers

    Different hanger shapes and sizes can make a closet feel crowded. Matching hangers create a more consistent appearance and can make better use of the available hanging space. Slim velvet hangers are one option for lightweight clothing, while sturdier hangers may be more suitable for coats and heavier garments.
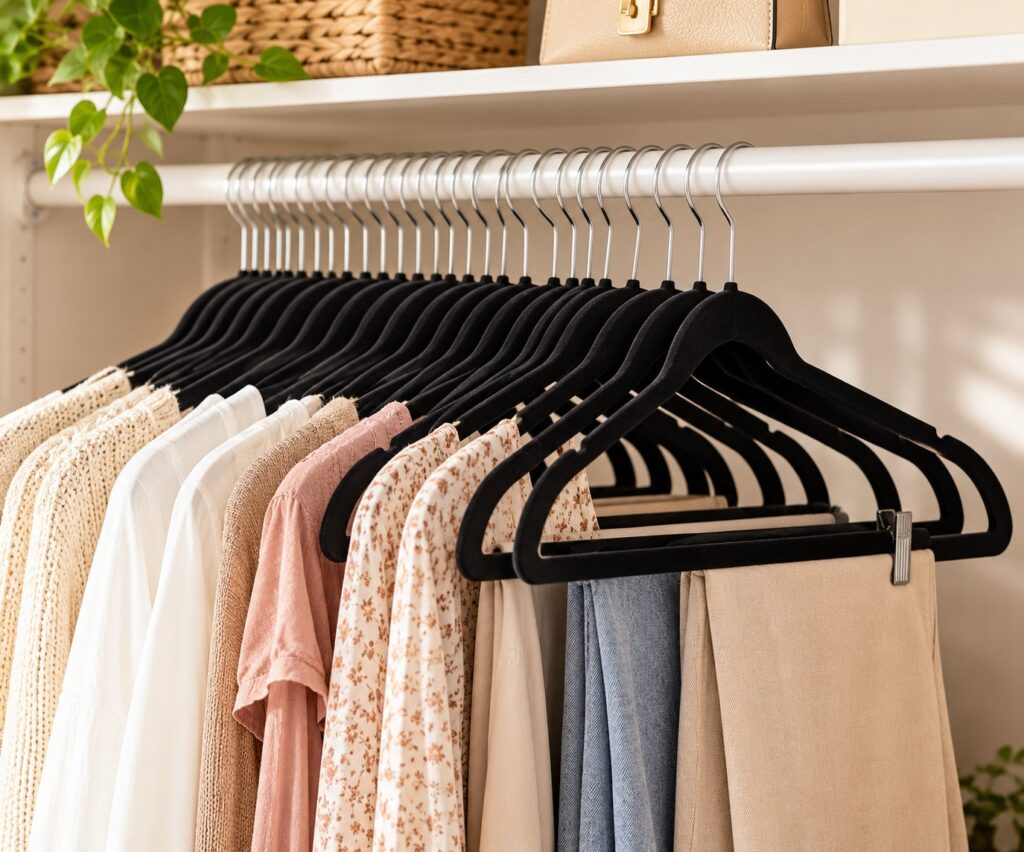
    Slim black velvet hangers on a white closet rod holding neatly arranged blouses, knits and pants

    Why it’s useful: Uniform hangers make clothes easier to arrange and can free up some rail space.

    What to look for:

    • A slim profile
    • Non-slip surfaces
    • Appropriate strength for your clothing
    • A rotating hook if you prefer that feature

    Best for: Small closets, shared wardrobes, and seasonal clothing organization.

    View the Velvet Hangers on Amazon


    11. Hanging Purse Organizer for Closets

    Handbags are easy to crush when they are piled on a shelf or left on the closet floor. A hanging purse organizer, like this AARAINBOW organizer, lets you store bags inside the closet so they are easier to see, reach, and put back.
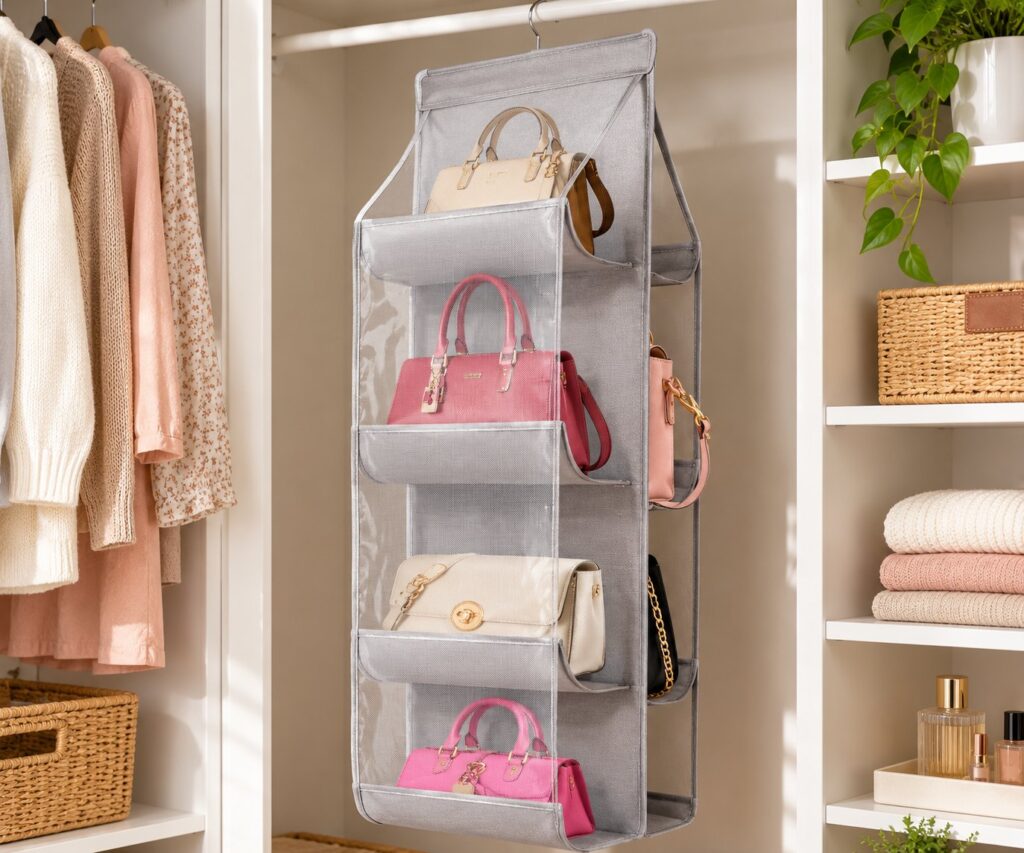
    Light gray hanging handbag organizer with clear pockets holding four handbags in a bright closet

    Why it’s useful: It gives each bag a designated spot and keeps purses off shelves and floors, which makes the closet look more orderly.

    What to look for:

    • A sturdy hanging hook or loop
    • compartments sized for the bags you own
    • a weight capacity suitable for your purses
    • breathable or easy-to-clean material

    Best for: Bedroom closets, entryway closets, and handbag collections.

    View the AARAINBOW Hanging Purse Organizer on Amazon


    12. Slim Rolling Storage Carts

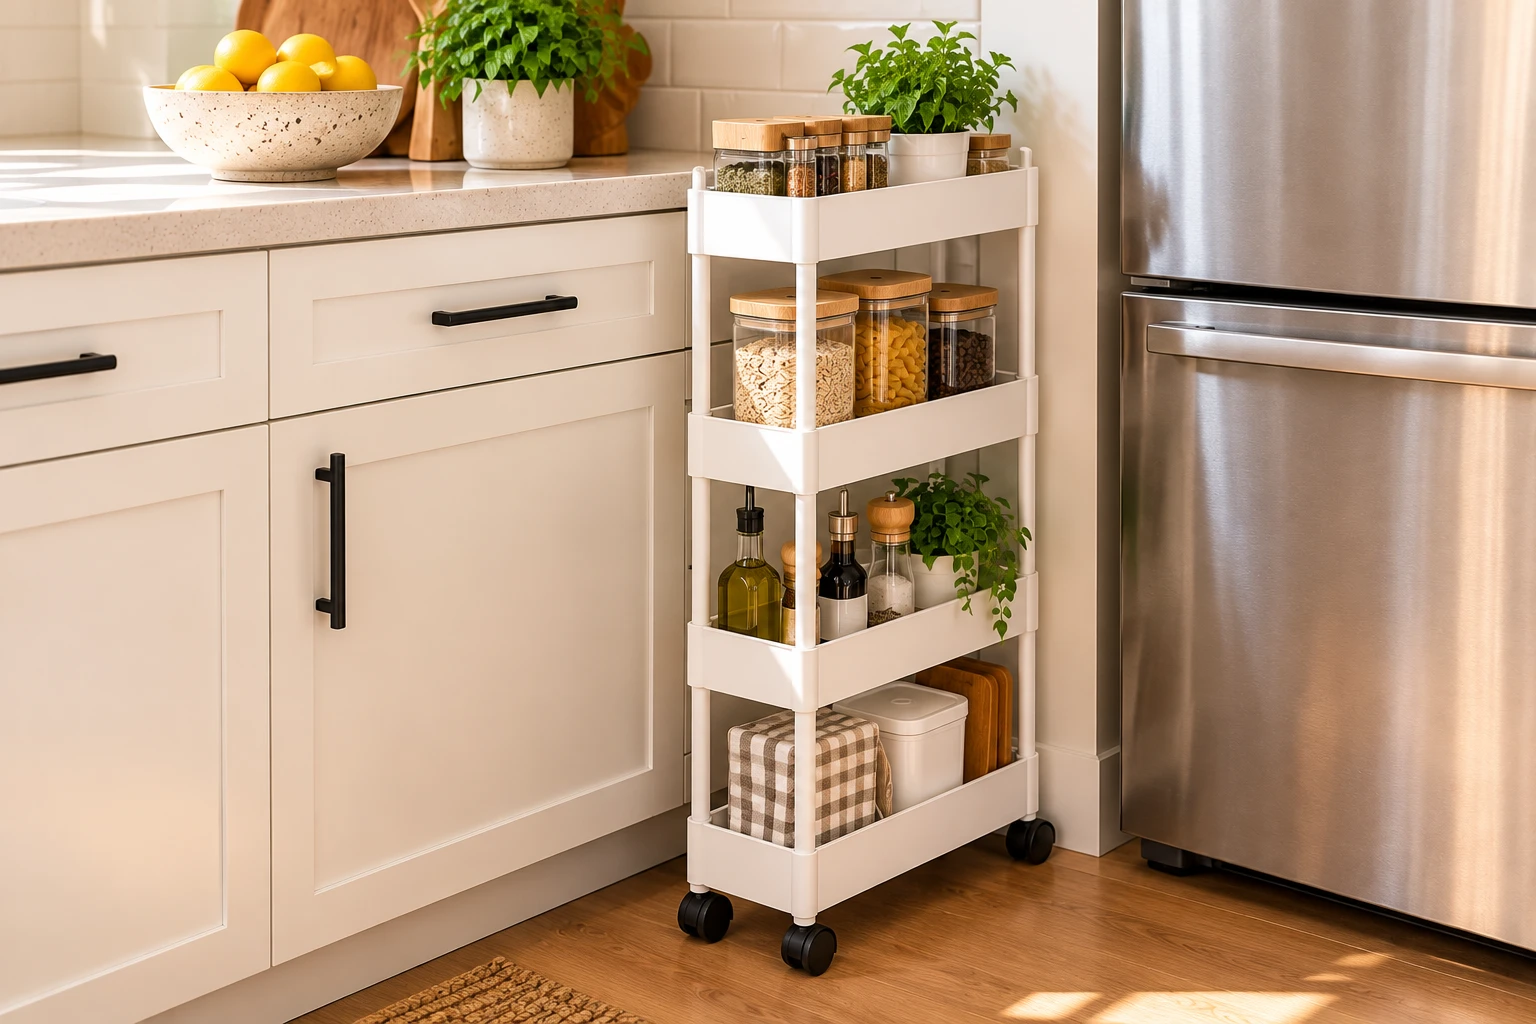
    Narrow gaps between appliances, cabinets, or bathroom fixtures can be difficult to use. A slim rolling cart can turn some of these spaces into functional storage. Depending on the location, you can use one for laundry supplies, pantry products, bathroom essentials, or cleaning items.
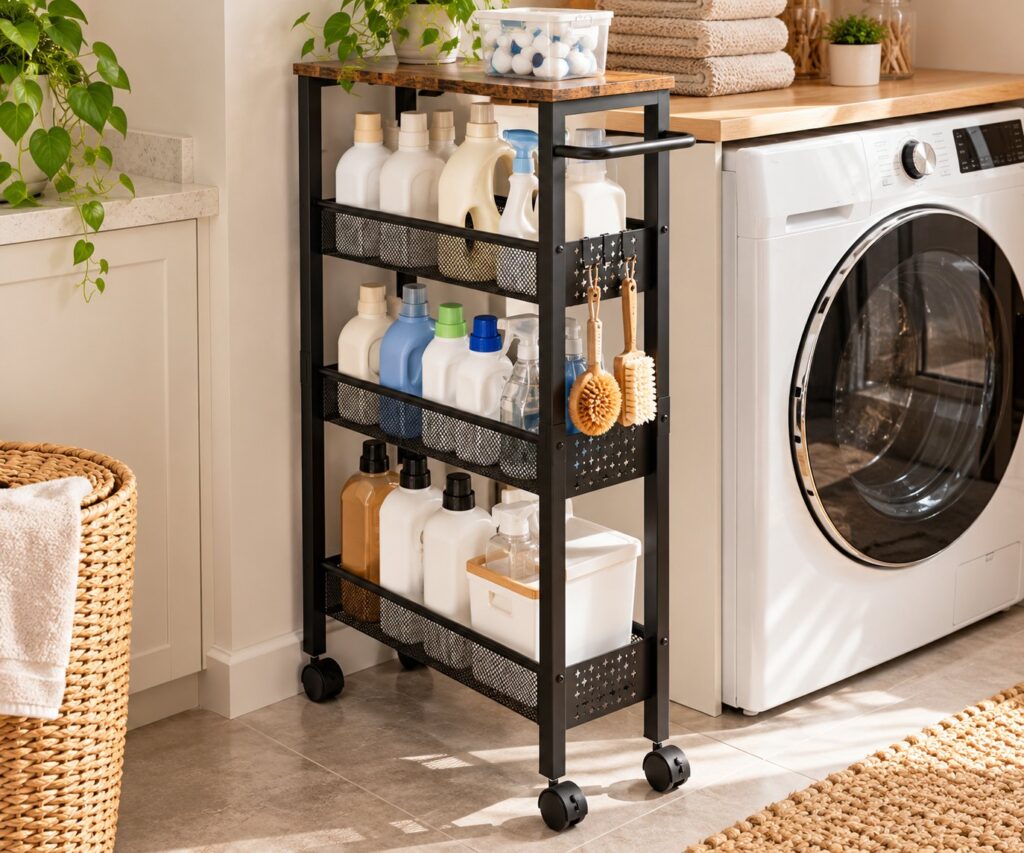
    Slim black four-tier rolling cart with laundry detergents and cleaning supplies beside a washing machine

    Why it’s useful: It takes advantage of otherwise unused floor space and keeps supplies together.

    What to look for:

    • Width and height that fit the available gap
    • Locking wheels if stability is important
    • Raised edges to help prevent items from falling
    • A weight capacity suitable for your supplies

    Best for: Apartments, laundry rooms, bathrooms, and narrow kitchen spaces.

    View the Slim Rolling Storage Cart on Amazon


    13. Airtight Food Storage Containers

    Open packages of cereal, flour, pasta, and other pantry staples can create a messy appearance and make ingredients harder to store neatly. A coordinated set of airtight containers can help organize dry foods and protect them from moisture and pests when properly sealed.
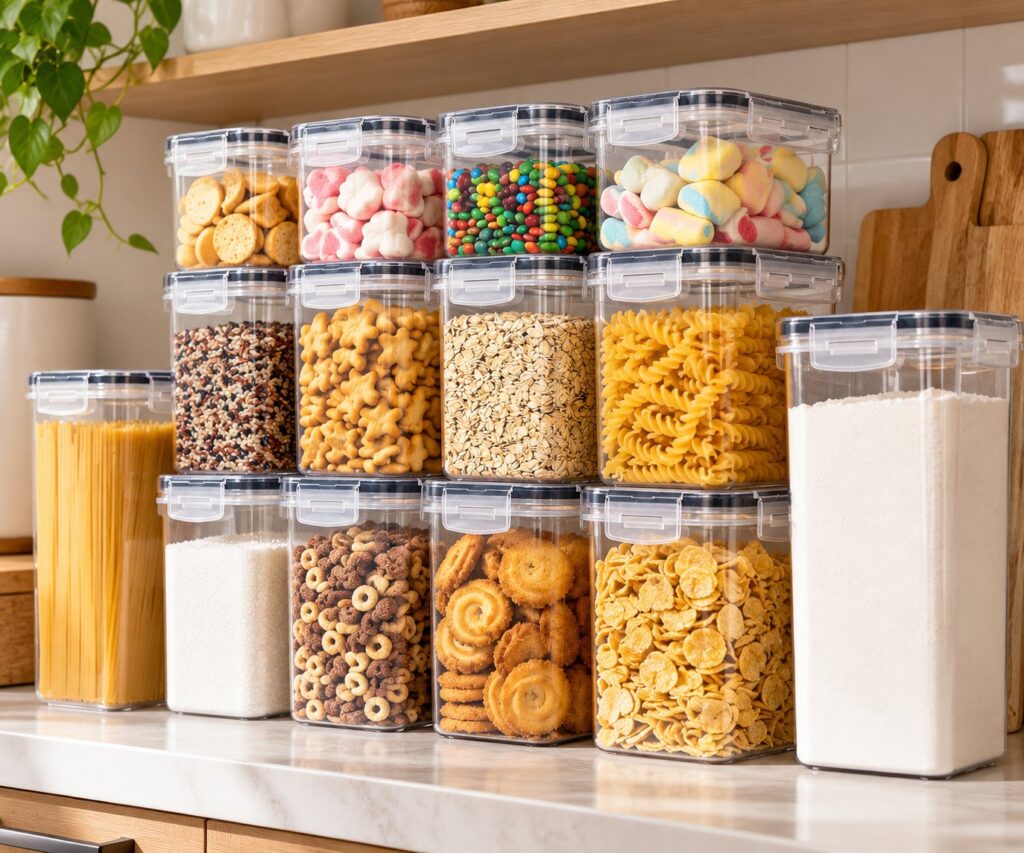
    Stack of clear airtight food storage containers with black-trimmed latching lids holding cereal, pasta, flour, sugar and snacks

    Why it’s useful: Consistent containers make pantry shelves easier to arrange, while airtight seals help maintain food quality.

    What to look for:

    • Secure, airtight lids
    • Food-safe materials
    • Sizes appropriate for your pantry staples
    • Openings wide enough for easy filling and cleaning

    Best for: Dry-food storage, baking ingredients, and organized pantry shelves.

    View the Airtight Food Storage Containers on Amazon


    14. Stackable Laundry and Closet Storage Bins

    Laundry rooms and closets often accumulate small items that do not have a designated home. Stackable bins can separate cleaning cloths, spare linens, accessories, and other household essentials. Use labels if several bins look alike, especially when storing items for different family members.
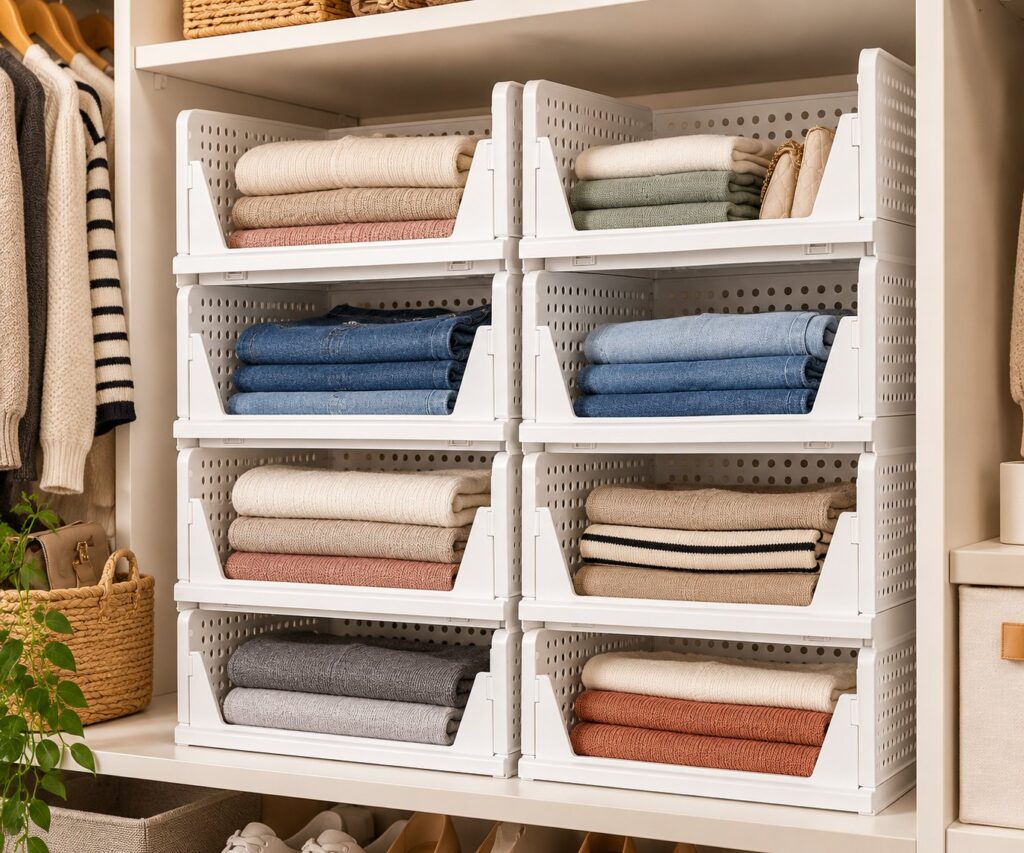
    Two stacks of white stackable perforated storage bins, open at the front, holding folded sweaters and jeans on a closet shelf

    Why it’s useful: Grouped storage makes it easier to maintain order and locate items quickly.

    What to look for:

    • A stackable design
    • Handles for easy removal
    • Durable materials
    • Dimensions that fit your shelf or cabinet

    Best for: Linen closets, laundry rooms, and bedroom storage.

    View the Stackable Closet Storage Bins on Amazon


    15. Refillable Soap Dispensers With Trays

    Kitchen and bathroom sinks often collect several bottles, creating unnecessary visual clutter. A refillable dispenser can replace disposable bottles or mismatched containers in the areas where you use soap. A small tray can also help contain drips, provided it is cleaned regularly.
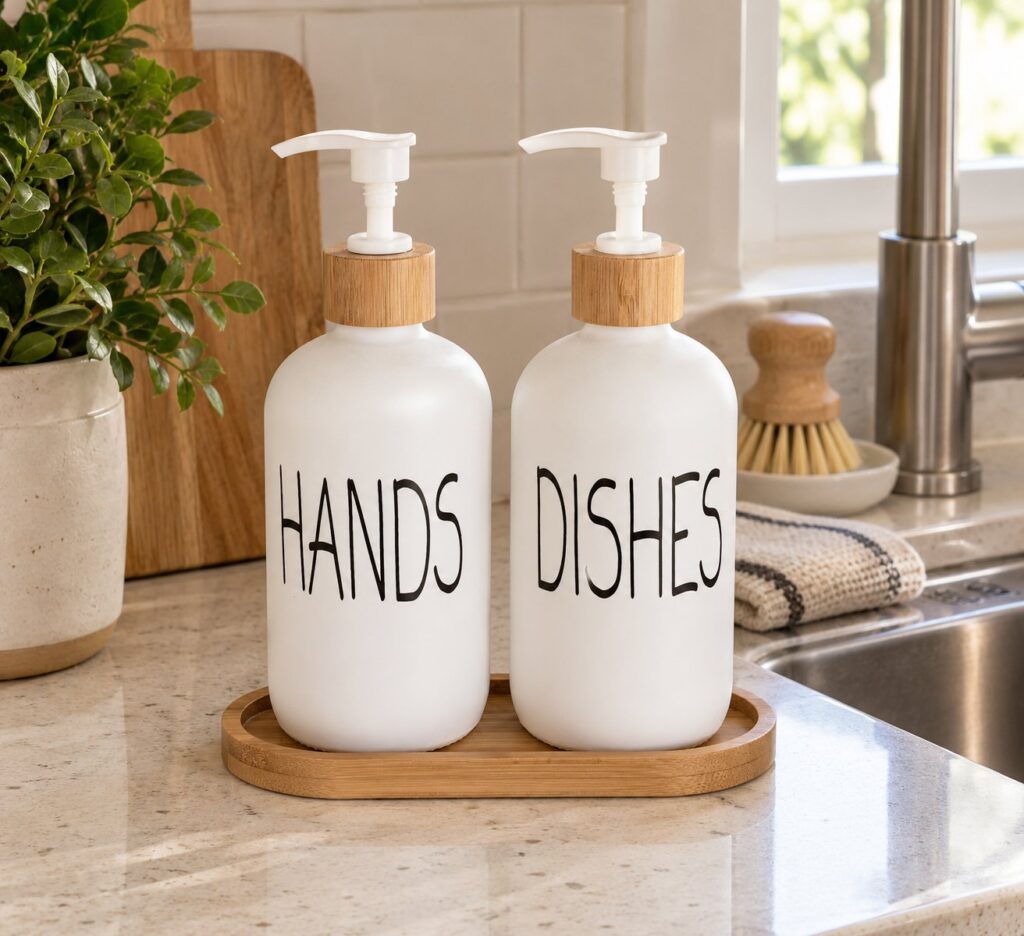
    White HANDS and DISHES soap dispensers with bamboo collars on a bamboo tray beside a kitchen sink

    Why it’s useful: It creates a more consistent setup and keeps everyday handwashing supplies together.

    What to look for:

    • A pump designed for the soap you use
    • A wide opening for refilling
    • Materials that are easy to clean
    • A tray that fits the available counter space

    Best for: Kitchen sinks, bathroom vanities, and laundry sinks.

    View the Soap Dispenser Set with Tray on Amazon

    5 Simple Ways to Make Your Home Look More Organized

    1. Clear the surfaces you use every day

    Keep only the items you regularly need on kitchen counters, bathroom vanities, and desks. Store everything else in an accessible place. For a full walkthrough, see our guide to keeping kitchen counters clutter-free.

    2. Group similar items together

    Store similar products in the same drawer, bin, or cabinet. This makes it easier to find things and return them to their proper place.

    3. Use vertical space

    Shelf risers, stackable containers, and over-the-door organizers can increase storage capacity without requiring more floor space.

    4. Choose storage that fits your home

    Measure before purchasing. An organizer that does not fit your cabinet or drawer can create another problem instead of solving one.

    5. Start with the area that frustrates you most

    If your kitchen counters are constantly crowded, start there. If your closet is difficult to manage, organize it first. Solving one recurring problem is more useful than buying several products you may not need.

    Frequently Asked Questions

    How can I make my home look more expensive on a small budget?

    Start by reducing clutter, organizing visible surfaces, and making better use of the storage you already have. A few well-chosen organizers can improve the appearance and functionality of a room without requiring a major purchase.

    What are the best Amazon home organization products for small spaces?

    Slim rolling carts, over-the-door organizers, shelf risers, stackable bins, and under-sink organizers are useful options because they help use vertical or overlooked spaces. The best choice depends on the dimensions of your home and the items you need to store.

    Are Amazon home organization products worth buying?

    They can be, provided they solve a real problem and fit your space. Before purchasing, check dimensions, materials, recent customer reviews, return information, and reviews that mention durability or installation issues.

    How do I organize my home without spending too much?

    Begin by sorting what you own and removing items you no longer use. Repurpose existing containers where possible, then purchase only the organizers that address the remaining problems.

    What should I organize first?

    Start with an area that creates daily frustration, such as a crowded kitchen counter, an overflowing bathroom drawer, or a disorganized pantry. Choose one small area and complete it before moving on to the next.

    Final Thoughts

    A home that looks organized is not necessarily a home filled with expensive products. Often, it is a home where everyday items have a place, storage works efficiently, and frequently used spaces are easy to maintain.

    You can start with one drawer, one cabinet, or one crowded counter. Identify what makes that area difficult to use, choose a practical solution, and build from there.

    If you are looking for affordable ways to make your home more functional, these Amazon home organization finds are a useful starting point. Focus on the products that solve your specific problems rather than buying everything on the list.

    Which area of your home would you organize first: the kitchen, bathroom, closet, or pantry? Save this guide on Pinterest so you can return to it when you are ready to organize your space.
  • How to Create a Coffee Station at Home in a Small Space

    How to Create a Coffee Station at Home in a Small Space

    A dedicated coffee station can make your morning routine easier, but it doesn’t have to take over your kitchen counter. With a few smart storage choices and a clear plan, you can create a coffee corner that feels organized, looks inviting, and keeps your everyday essentials within reach.

    Whether you make espresso, brew regular coffee, or enjoy flavored drinks with milk and syrup, the goal is the same: give everything a place without creating another cluttered surface.

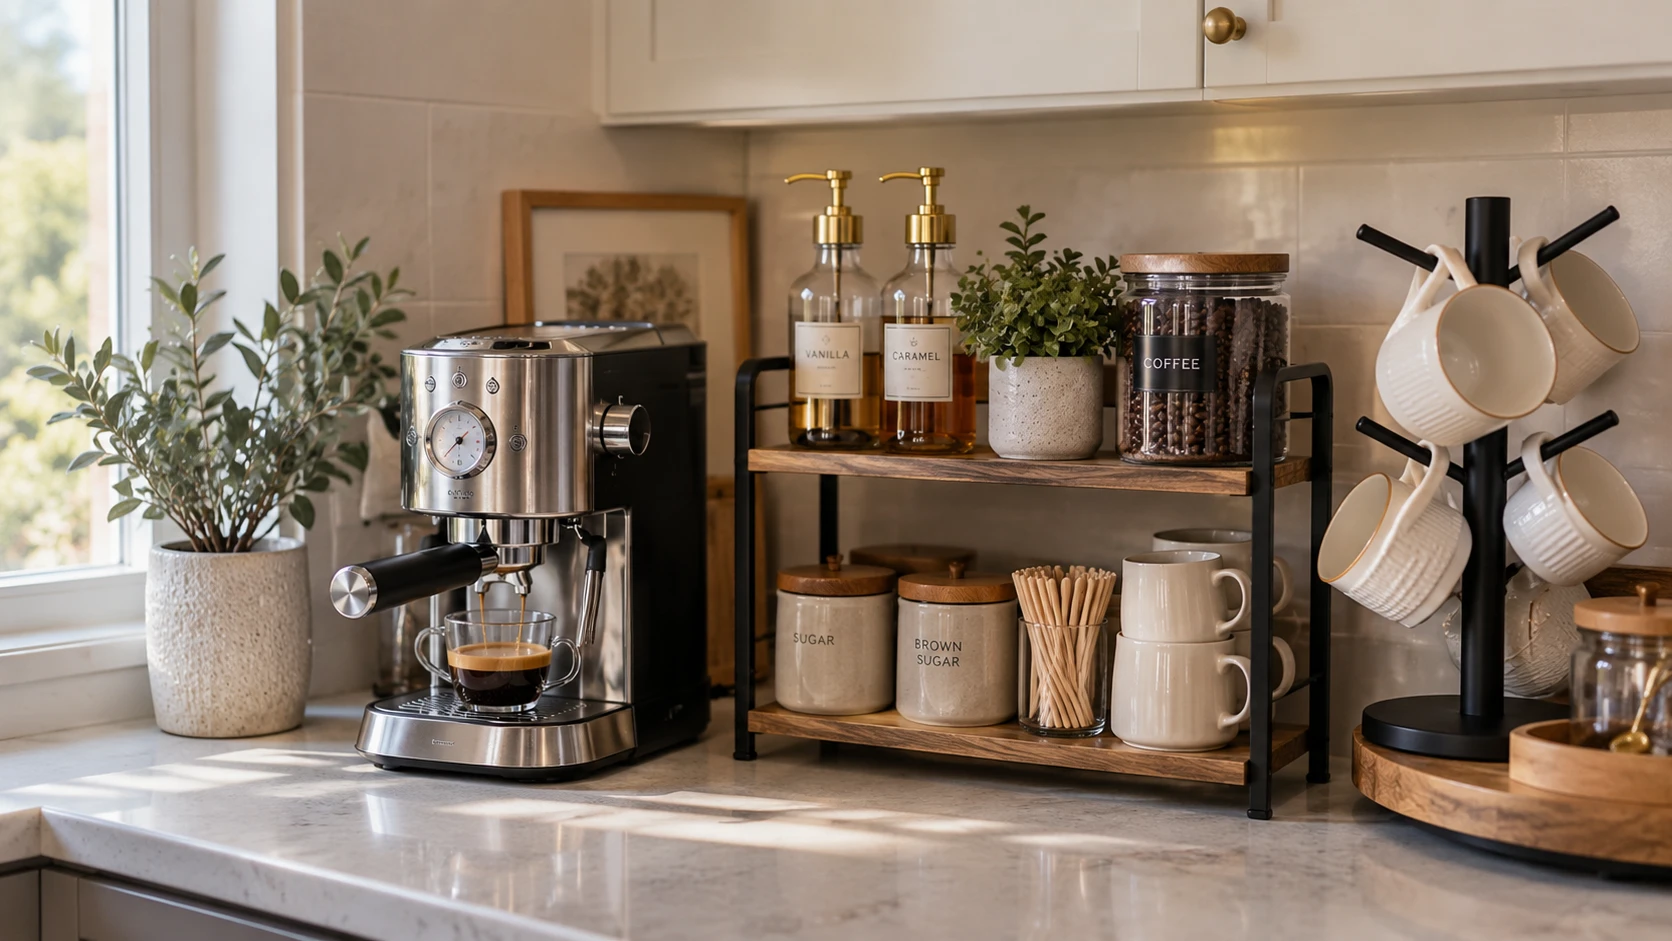
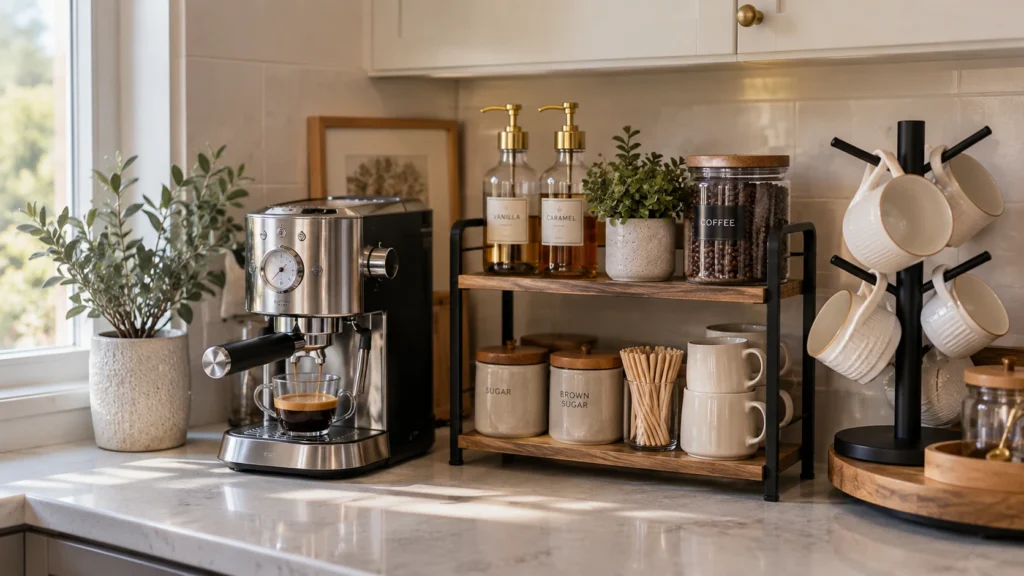
    Small home coffee station with an espresso machine, organized coffee supplies, and compact countertop storage.

    1. Choose a Spot That Fits Your Routine

    Start by looking for a location that makes sense for the way you prepare coffee. A small section of countertop near an outlet is often enough. You might also use a corner beside the refrigerator or a separate shelf if your kitchen has limited workspace.

    Before arranging anything, measure the available width and depth. Leave enough room to operate your coffee maker, fill a mug, and clean up comfortably.

    Keep the station away from areas where you regularly chop ingredients or prepare meals. Your coffee corner should make the kitchen more functional, not take away the workspace you need.

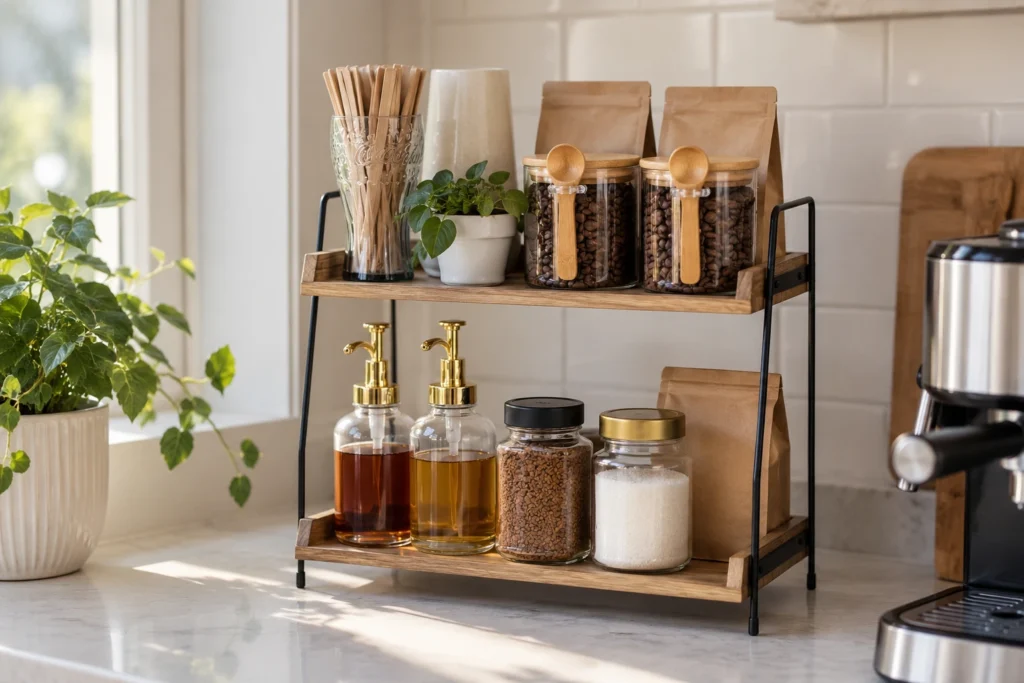
    2. Use a Two-Tier Organizer to Create More Room

    When counter space is limited, using vertical storage can make a noticeable difference. A two-tier organizer allows you to separate items by how you use them instead of spreading everything across the counter.

    The ANBOXIT two-tier coffee station organizer can hold items such as coffee supplies, syrup bottles, small containers, and accessories. You can reserve the upper level for frequently used essentials and the lower level for backup supplies or less frequently used items.

    Two-tier wood and black metal coffee station organizer holding coffee beans, syrups, and small kitchen essentials.

    Keep the arrangement simple. If every shelf is packed, the station may look just as cluttered as before. Leave some open space and store only the items you regularly use.

    Shop the organizer:

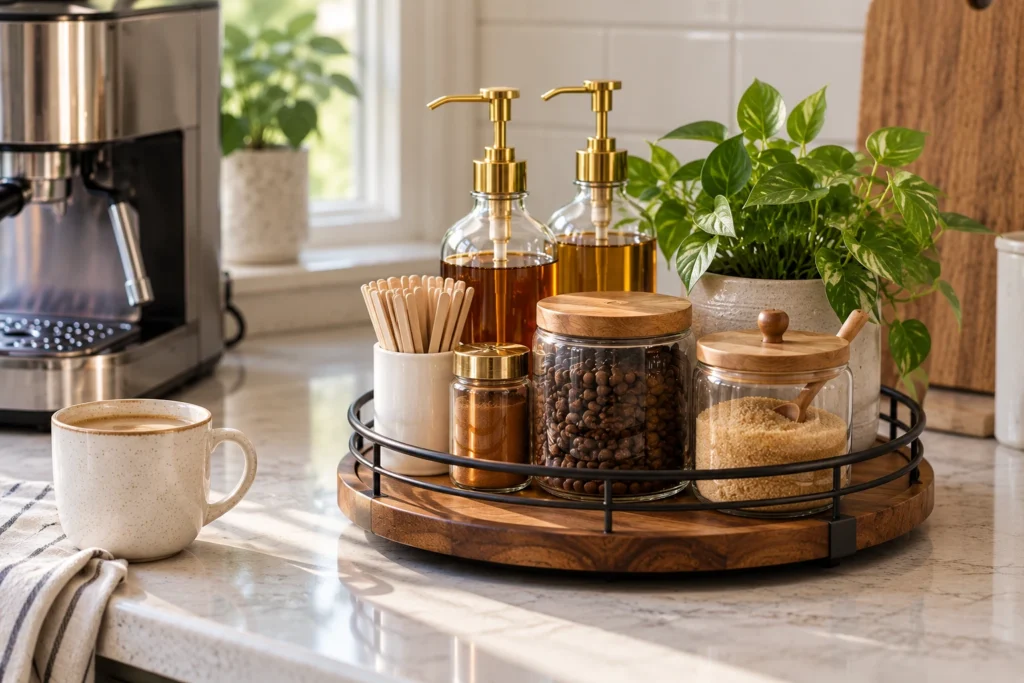
    3. Group Small Accessories on a Rotating Tray

    Small bottles and containers can quickly spread across a counter. A rotating tray keeps them together and makes it easier to reach what you need, especially when the station sits in a corner.

    The AMH farmhouse oak wood Lazy Susan organizer is an option for grouping syrup bottles, sugar, small jars, or other coffee accessories. Turn the tray to reach items at the back instead of moving several containers every time you make a drink.

    Round wooden rotating tray with black metal rim organizing coffee syrups, beans, and sugar jars on a kitchen counter.

    Choose the items based on your routine. If you rarely use flavored syrups, keep only your favorites on the tray and store the rest elsewhere. The purpose is to make daily coffee preparation easier, not to display every ingredient you own.

    Shop the tray:

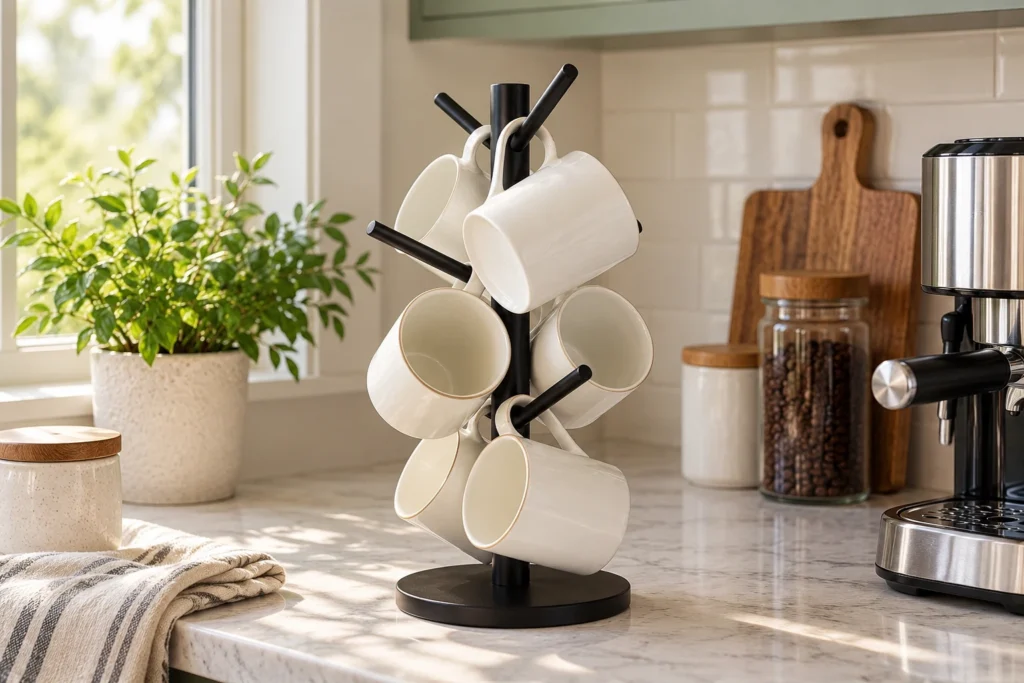
    4. Store Mugs Vertically

    Mugs are useful, but a collection of them can occupy an entire shelf or a large part of your countertop. A mug stand gives your everyday cups a dedicated place while keeping them easy to grab.

    The MyLifeUNIT mug holder uses a vertical design to display mugs on hooks. Place it where the cups are easy to reach but do not interfere with your coffee maker or the space where you prepare drinks.

    Black metal mug tree holding cream ceramic mugs on a kitchen countertop beside a coffee machine.

    Start with the mugs you use most often. Store seasonal cups, oversized mugs, and extras in a cabinet so your coffee station remains compact.

    Shop the mug holder:

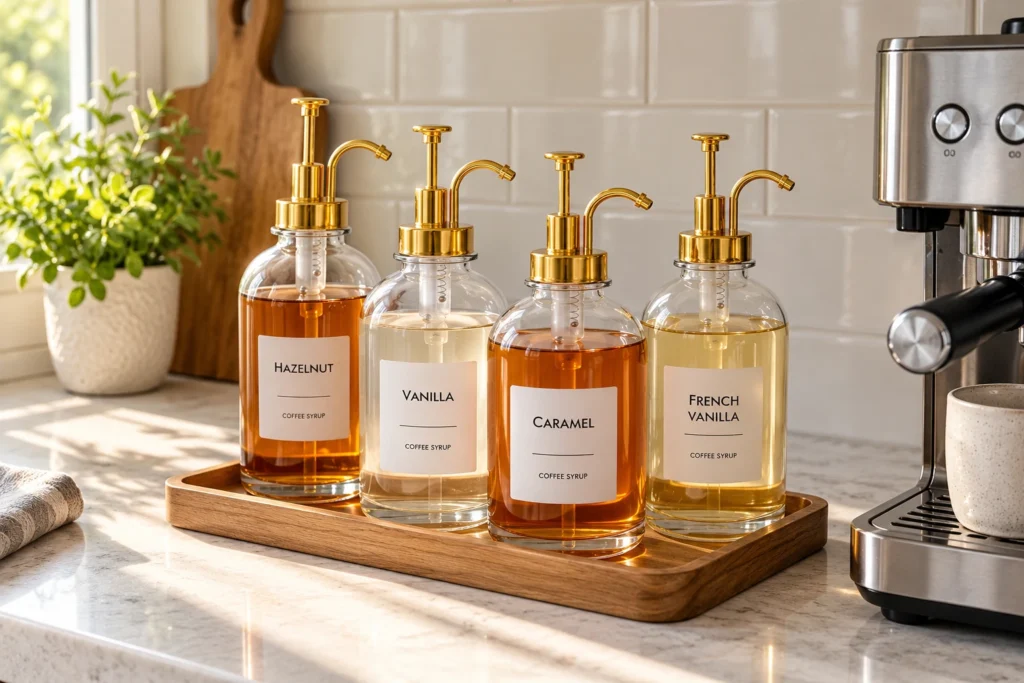
    5. Keep Coffee Syrups Together

    If you enjoy flavored coffee, syrup bottles can become one of the biggest sources of visual clutter. Different bottle shapes and labels may also make the station feel less cohesive.

    The New England Stories glass syrup dispenser set can help create a more coordinated setup for flavored drinks. Group the syrups together on your tray or organizer and keep the bottles you use most often within easy reach.

    Four glass coffee syrup dispensers with gold pumps arranged on a wooden tray beside an espresso machine.

    Avoid keeping more bottles out than you need. You can store extra flavors in a cabinet and rotate them when you want to change your routine.

    If you transfer syrups into separate dispensers, label them clearly and follow the storage instructions on the original product packaging.

    Shop the dispensers:

    6. Give Coffee Beans or Grounds a Dedicated Container

    Coffee packaging can be awkward to stack, and open bags may make a station look unfinished. A dedicated coffee container creates a consistent place for your everyday supply.

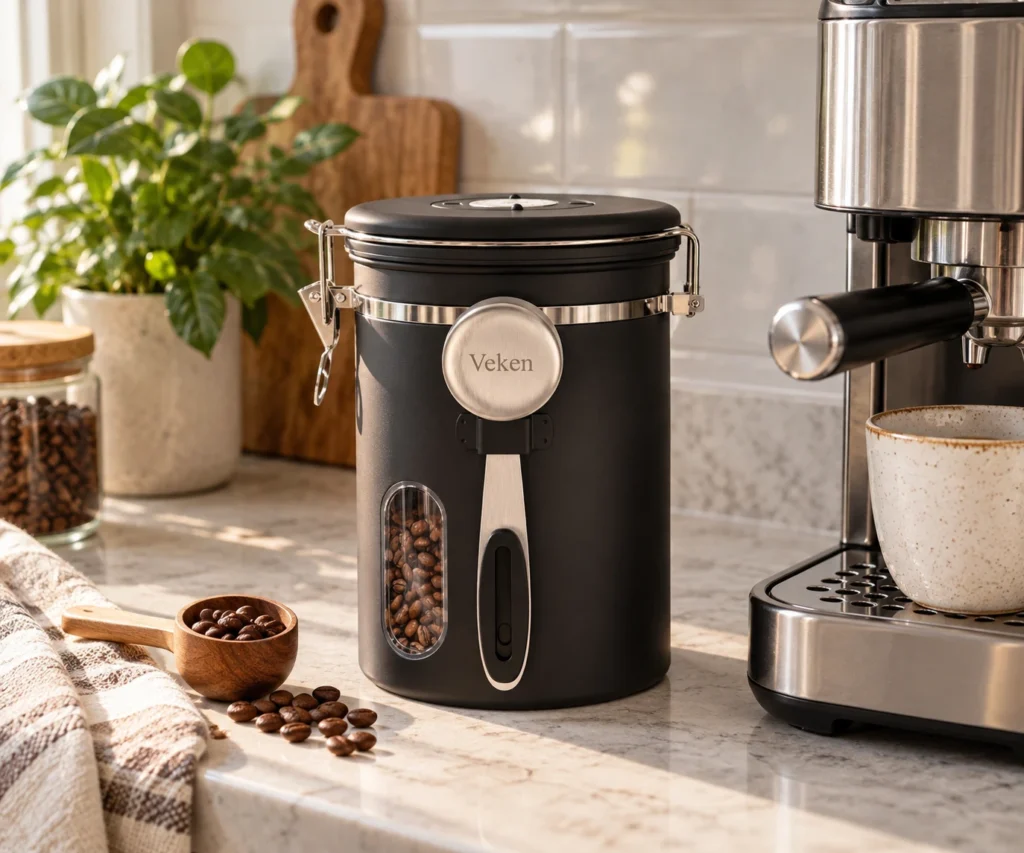
    The Veken coffee canister is designed for storing coffee and keeping it accessible. Place it near your coffee maker, away from heat, direct sunlight, and moisture. Follow the manufacturer’s instructions for using and cleaning the container.

    Black Veken coffee canister with a viewing window beside an espresso machine on a kitchen counter.

    You don’t need to decant every ingredient in your kitchen. Start with the coffee you use daily, then decide whether sugar, tea, or other supplies would benefit from their own containers.

    Shop the canister:

    7. Choose a Coffee Maker That Matches Your Space

    Your coffee maker will probably be the largest item in the station, so measure before choosing its permanent location. Consider its footprint, the clearance needed to operate it, and whether you can refill and clean it easily.

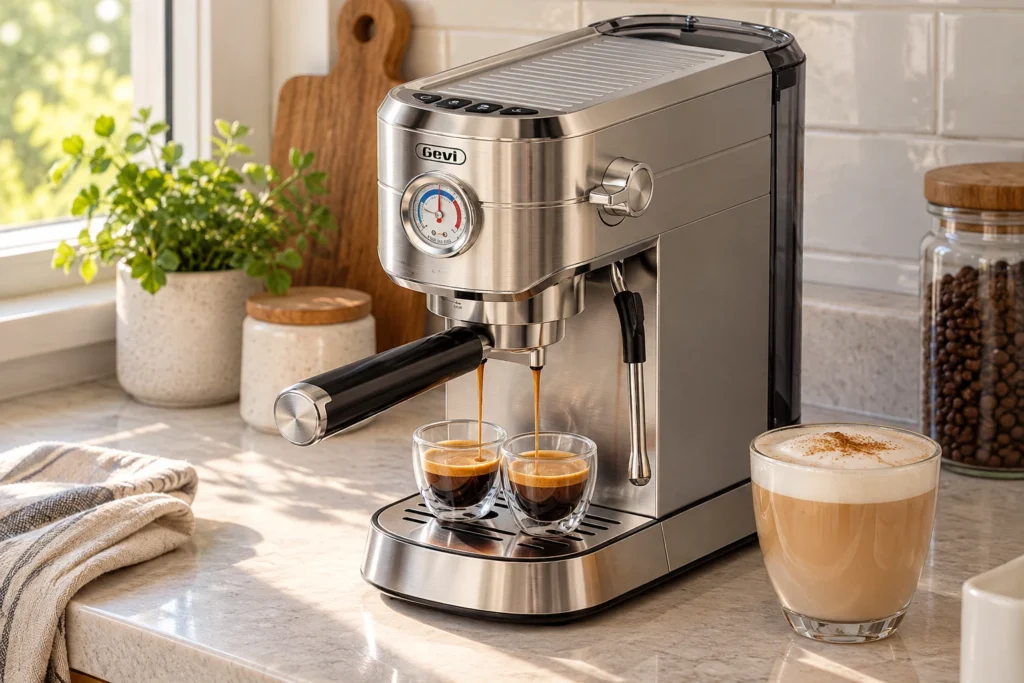
    The Gevi 20 Bar Compact Espresso Machine is an option for a home coffee corner focused on espresso and milk-based drinks. Before purchasing, confirm that its dimensions and operating requirements suit your counter and routine.

    Gevi stainless steel espresso machine with pressure gauge and steam wand on a kitchen counter.

    If you already own a coffee maker that works well, keep it. You do not need to replace an appliance just to create a more organized station. Better placement and storage can make a bigger difference than buying new equipment.

    Shop the espresso machine:

    8. Keep Only Everyday Essentials on Display

    A coffee station is easier to maintain when it contains only what you need regularly. Too many decorative objects, spare mugs, and rarely used accessories can take away valuable workspace.

    Try this simple arrangement:

    • Daily essentials: coffee maker, coffee, and your favorite mug.
    • Frequently used extras: sweetener, milk frother, or one or two syrup bottles.
    • Occasional items: extra mugs, seasonal flavors, and backup supplies stored in a cabinet.

    Leave a clear area where you can set down a mug and prepare your drink. An organized station should support your routine rather than require constant rearranging.

    9. Make the Coffee Corner Feel Intentional

    You can make a small station look cohesive without adding lots of decoration. Choose a simple color palette and repeat a few materials, such as wood, black metal, glass, or neutral ceramics.

    A small plant, one framed print, or a coordinated set of containers can add personality. Just avoid placing decorative items where they make cleaning difficult or compete with the space needed for coffee preparation.

    If your kitchen counter is already crowded, review the ideas in our guide to keeping kitchen counters clutter-free in a small kitchen. The same principle applies here: every item should have a clear purpose.

    10. Create a Two-Minute Coffee Station Reset

    A quick reset at the end of the day helps prevent the coffee corner from becoming another cluttered area.

    1. Return coffee, syrups, and accessories to their assigned spots.
    2. Wipe up spills and clean the area around the coffee maker.
    3. Wash used mugs and put away anything that doesn’t belong.
    4. Check whether any items can be moved off the counter.

    This small habit makes the station easier to use the next morning and helps protect the rest of your kitchen workspace.

    What Do You Need for a Small Coffee Station?

    You can start with just a few essentials. The right setup depends on your available space and the drinks you make.

    • A coffee maker that fits your counter.
    • A tray or tiered organizer to group supplies.
    • A mug holder if cabinet or counter space is limited.
    • A dedicated container for coffee beans or grounds.
    • Syrup dispensers if you regularly make flavored drinks.

    You don’t need to purchase everything at once. Start with the items that solve your biggest organizational problem and add more only if they make your routine easier.

    Common Coffee Station Mistakes to Avoid

    Choosing a spot before measuring. A coffee maker may need more clearance than expected. Measure the area and account for how the machine opens, fills, or operates.

    Displaying too many products. A large collection of syrups, mugs, and accessories can make a small station feel crowded. Keep your favorites accessible and store extras elsewhere.

    Ignoring cleaning and maintenance. Coffee grounds, syrup drips, and water spills build up quickly. Leave enough room to wipe surfaces and clean your equipment.

    Buying organizers that don’t fit your routine. A product is useful only if it makes your daily process easier. Check measurements and consider what you actually need to store.

    Decorating before organizing. First establish where the coffee maker and supplies belong. Add decorative touches only after the station works well.

    Frequently Asked Questions

    How much space do you need for a coffee station?

    A coffee station can fit on a small section of countertop. Measure your coffee maker first, then allow room for a mug and the supplies you use daily. Vertical storage can help you make better use of limited space.

    What should you put on a coffee station?

    Start with your coffee maker, coffee, mugs, and any daily essentials such as sugar or your favorite syrup. Store backup supplies and rarely used accessories elsewhere to keep the surface clear.

    How do you organize a coffee station on a budget?

    Use items you already own before buying organizers. Repurpose a tray, limit the number of mugs on display, and group small accessories together. Purchase new storage only when it solves a specific problem.

    How can you make a coffee station look aesthetic?

    Choose a consistent color palette, group similar items, and leave some open space. A few coordinated containers or one small decorative accent can create a polished look without overcrowding the counter.

    Where should you put a coffee station in a small kitchen?

    Look for an accessible counter corner near a suitable outlet, while keeping the main food-preparation area clear. Check the appliance’s operating requirements and avoid placing it where heat, moisture, or daily kitchen activity will interfere.

    Final Thoughts

    Creating a coffee station at home doesn’t require a dedicated room or a large countertop. A well-chosen location, a few useful organizers, and a clear system for everyday supplies can make your morning routine more convenient.

    Start with the space you have, keep only the essentials within reach, and add storage where it genuinely helps. The best coffee station is one that fits your kitchen and makes daily coffee easier to enjoy.

    Shop the Coffee Station Finds

    Here are the products featured in this guide:

    This post may contain affiliate links. If you purchase through these links, Home Finds Studio may earn a commission at no additional cost to you.

  • How to Keep Kitchen Counters Clutter-Free in a Small Kitchen

    How to Keep Kitchen Counters Clutter-Free in a Small Kitchen

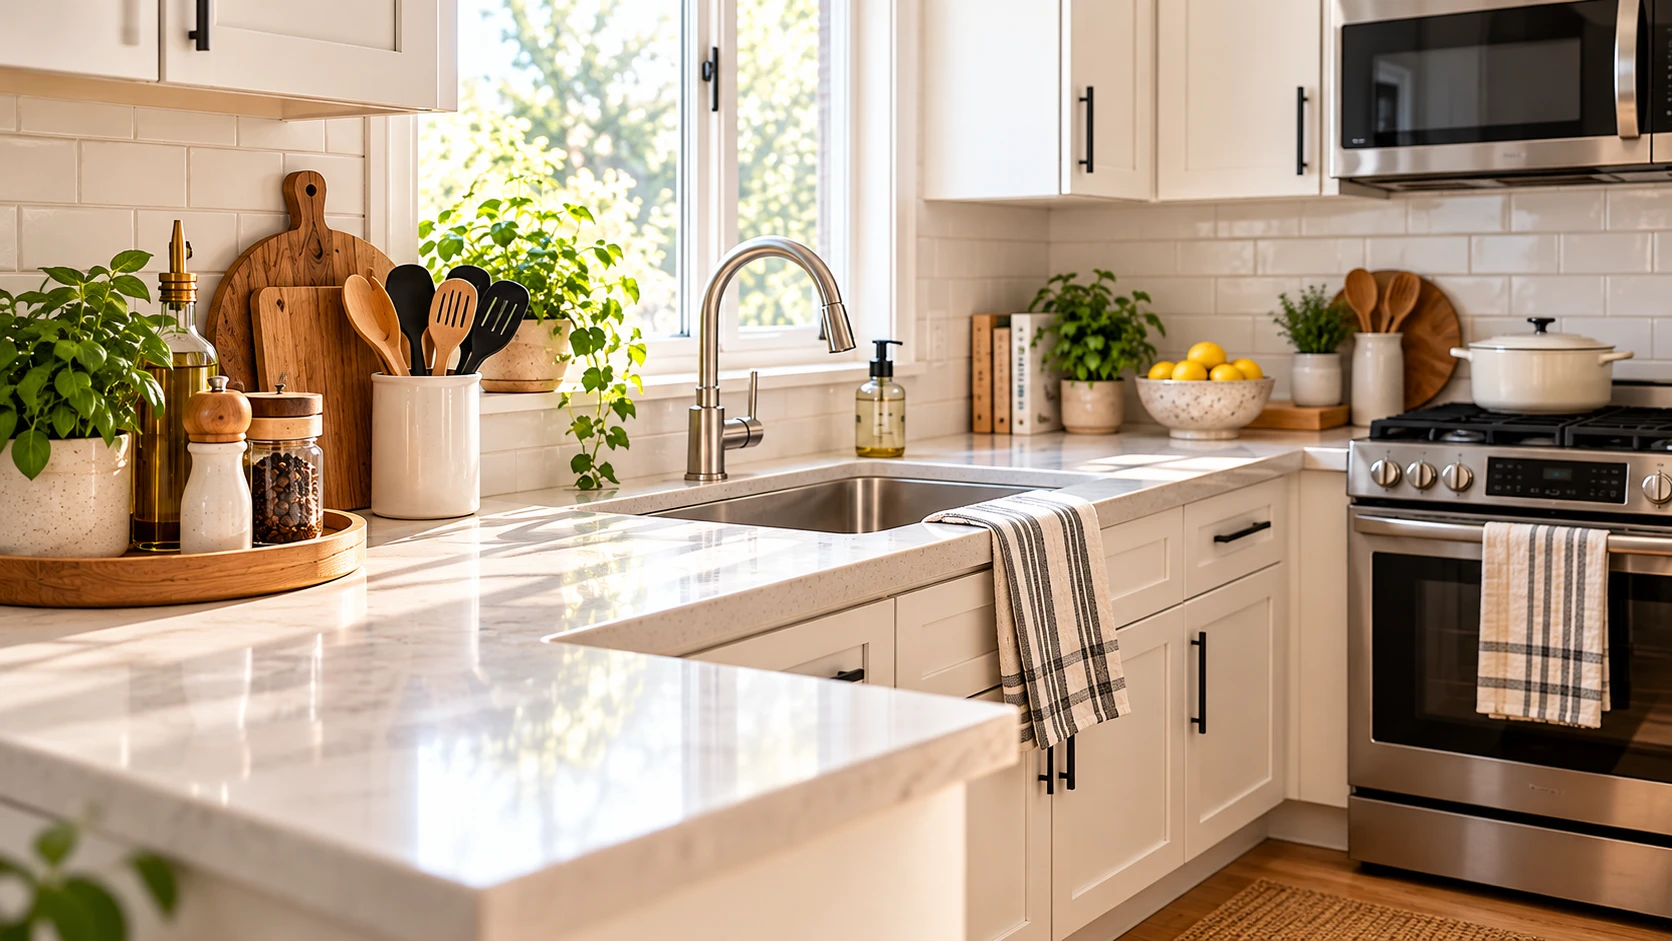
    Bright kitchen with organized countertops and clear workspace

    You clean your kitchen, put a few things away, and wipe down the counters. But somehow, a few hours later, everything is right back where it started.

    The coffee maker sits beside the toaster. Cooking utensils collect near the stove. Mail lands next to the fruit bowl, and small appliances take up the workspace you need to prepare meals.

    If this sounds familiar, you probably don’t need to clean more often. You need a better system for deciding what belongs on your counters and where everything else should go.

    The good news is that you can make a small kitchen feel more organized without remodeling, buying expensive cabinets, or hiding everything you use every day.

    These practical kitchen counter organization ideas will help you reclaim your workspace while keeping your kitchen comfortable, attractive, and easy to maintain.

    1. Decide What Actually Deserves a Spot on Your Counter

    The first step is not buying organizers. It’s deciding what you genuinely need within reach.

    Look at everything currently sitting on your countertops and ask yourself three questions:

    • Do I use this almost every day?
    • Is it difficult or inconvenient to store somewhere else?
    • Does keeping it here make cooking easier?

    Your coffee maker might deserve a permanent spot if you use it every morning. An appliance you use twice a month probably doesn’t need to occupy valuable workspace.

    Create three groups:

    Keep on the counter: Everyday essentials you use frequently.

    Store nearby: Items you use regularly but don’t need to see all day.

    Remove: Things that don’t belong in the kitchen or that you no longer use.

    You don’t need completely empty countertops. You need enough clear space to work comfortably.

    2. Create a Coffee Station Without Losing Your Workspace

    Coffee makers, mugs, sugar containers, coffee bags, and accessories can quickly take over a small kitchen.

    Instead of spreading everything across the counter, create one compact coffee station.

    Start by grouping your essentials together. Use a small tray to keep frequently used accessories contained, and store extra mugs or coffee supplies in a nearby cabinet.

    If your counter is particularly narrow, consider a compact coffee cart or a shelf that fits your available space.

    Products worth considering:

    • A small coffee station tray
    • A compact mug holder
    • Airtight coffee storage containers
    • A narrow rolling cart

    Choose only what solves your specific problem. A tray is helpful when it contains a few items, but it won’t create more space if you use it to collect clutter.

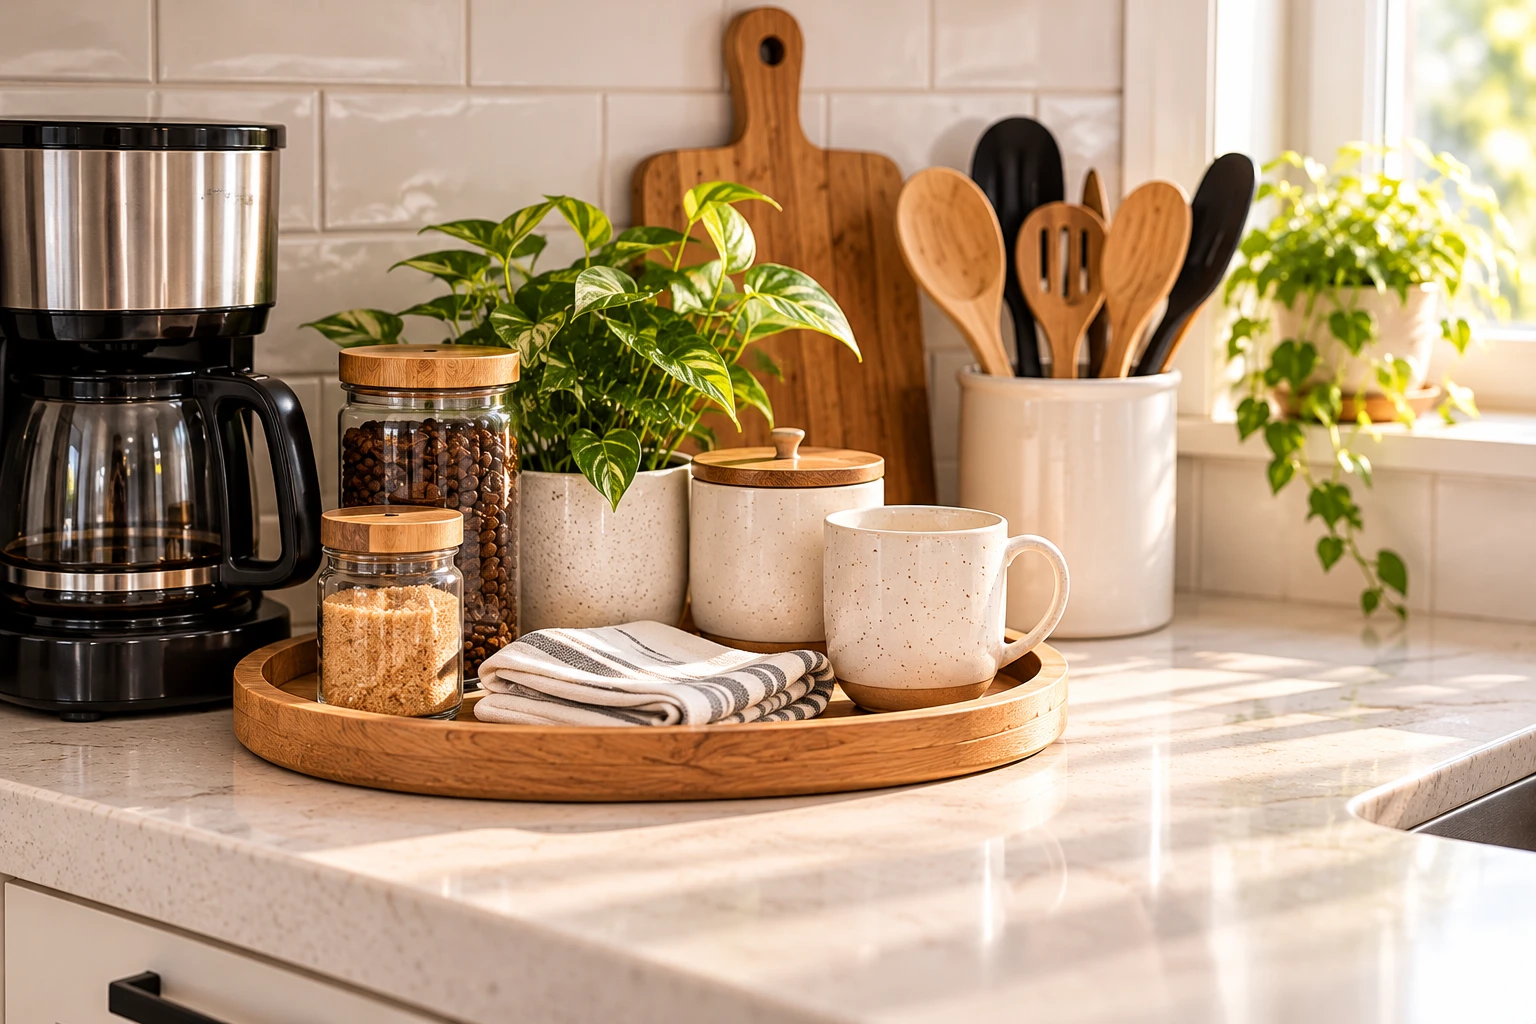
    Organized kitchen coffee station with a wooden countertop tray, coffee maker, jars, and ceramic mug

    3. Move Cooking Essentials Closer to Where You Use Them

    Cooking utensils often accumulate beside the stove because that’s where they’re most convenient.

    You don’t necessarily need to put everything away. Instead, reduce the number of items occupying your workspace.

    Keep your most frequently used utensils in one compact holder. Store duplicate tools, specialty gadgets, and less frequently used utensils in a nearby drawer.

    If your drawers are crowded, drawer dividers can help you use the space more efficiently.

    For kitchens with limited counter space, a wall-mounted utensil rail may also be worth considering, provided it can be installed safely and kept away from heat sources.

    Products worth considering:

    • Adjustable drawer dividers
    • A compact utensil holder
    • A wall-mounted utensil rail
    • A magnetic knife strip suitable for your kitchen setup

    The goal is to keep cooking tools accessible without allowing them to spread across the entire counter.

    Kitchen drawer neatly organized with bamboo dividers for cooking utensils

    4. Use the Space Inside Your Cabinets

    Sometimes the problem isn’t a lack of cabinets. It’s that the available space isn’t being used efficiently.

    Before purchasing more storage, inspect the cabinets closest to your main workspace.

    Could you store more items there if you added a shelf riser? Would drawer dividers help? Could you move occasional-use appliances to a higher shelf?

    A few small adjustments can make existing cabinets more functional.

    Consider:

    • Shelf risers for cups, bowls, and pantry items
    • Drawer organizers for utensils and small tools
    • Pull-out organizers for suitable cabinets
    • Vertical dividers for cutting boards and baking sheets

    Measure the available space before buying anything. Cabinet dimensions, hinges, plumbing, and shelf heights can affect whether an organizer will fit.

    Kitchen cabinet with a shelf riser organizing plates, bowls, and mugs

    For more ideas, read our guide to 18 Amazon Kitchen Organization Products That Actually Save Space.

    5. Give Mail, Keys, and Random Items a Different Home

    Not everything cluttering your kitchen counter belongs in the kitchen.

    Mail, receipts, keys, chargers, school papers, and bags often land on the nearest available surface because there isn’t an obvious alternative.

    Create a designated drop zone somewhere more appropriate, such as an entryway shelf, wall organizer, or small basket near the door.

    If you must keep paperwork in the kitchen, use one compact file holder and establish a regular time to sort it.

    The important part is creating a convenient place for these items before they reach your countertop.

    A beautiful kitchen organizer won’t solve a problem caused by belongings that don’t have a proper home.

    6. Make the Space Around Your Sink Easier to Maintain

    The area around the kitchen sink often becomes crowded with dish soap, sponges, brushes, hand soap, and dish-drying accessories.

    Start by removing anything you don’t use regularly.

    Then decide which essentials need to remain within reach and which can be stored under the sink.

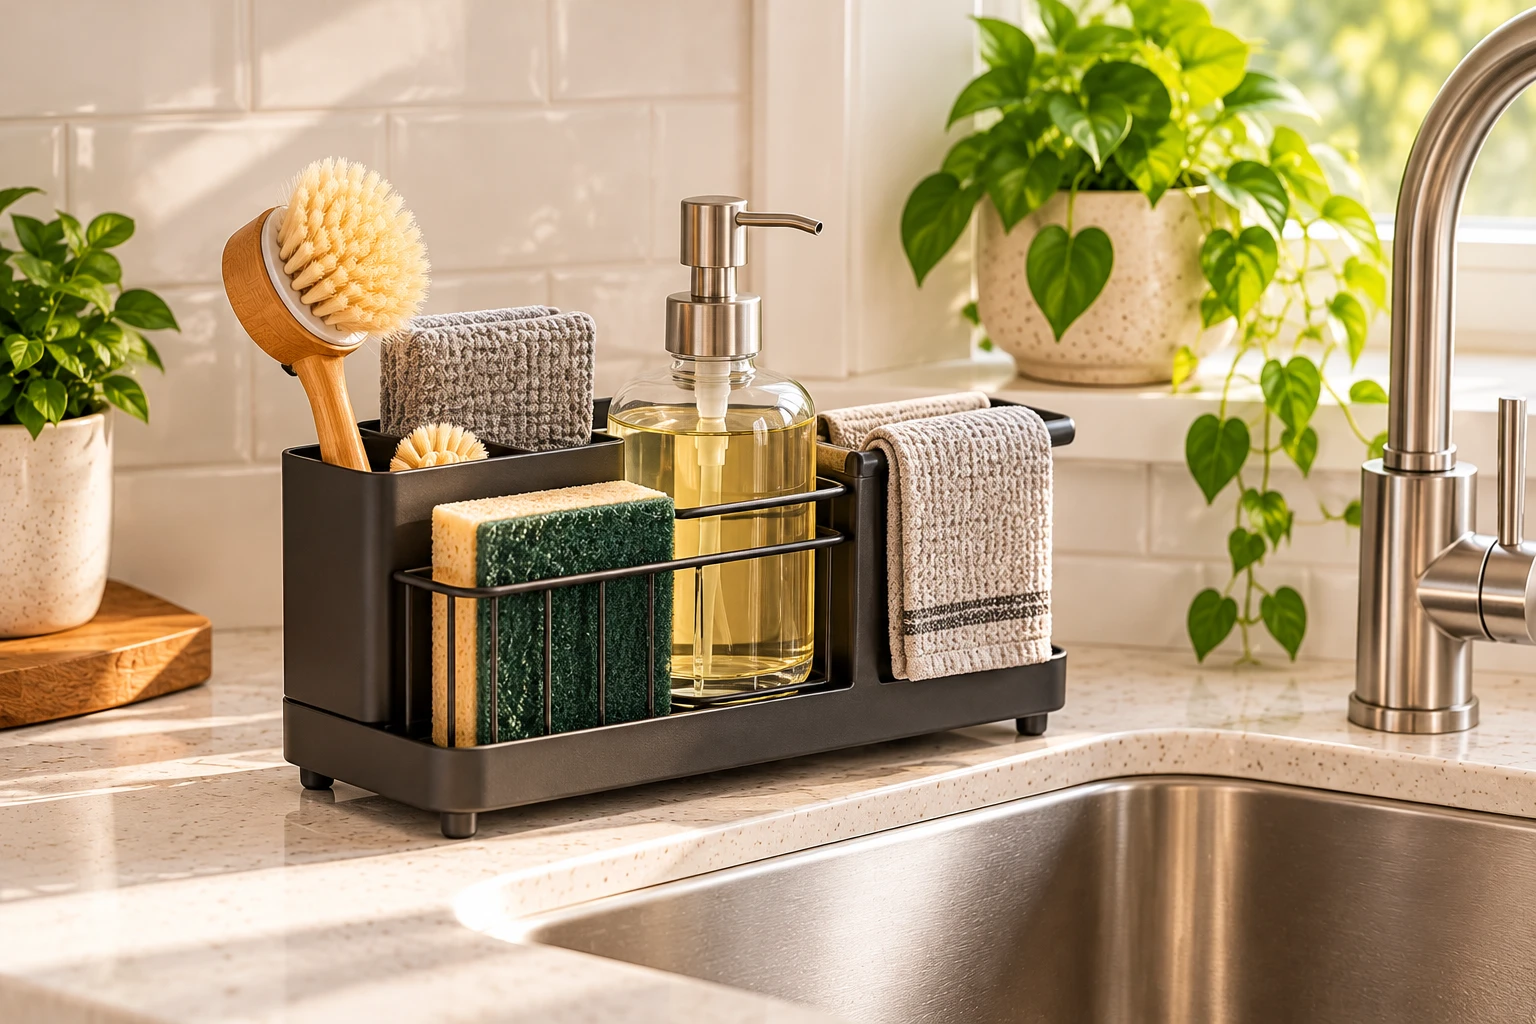
    A compact sink caddy can contain sponges and brushes. A suitable dish-drying rack can help if you wash dishes by hand, but choose one that fits your sink and doesn’t unnecessarily consume your preparation area.

    If you use a drying mat instead, put it away when it’s no longer needed, provided your dishes and the mat are dry.

    Products worth considering:

    • A compact sink caddy
    • A space-saving dish-drying rack
    • A washable drying mat
    • An under-sink organizer for cleaning supplies

    Keep cleaning products safely stored, away from food and food-contact items. Make sure the cabinet remains accessible and that organizers don’t interfere with plumbing or create moisture problems.

    Kitchen sink caddy organizing dish soap, brushes, and sponges

    7. Store Small Appliances According to How Often You Use Them

    Small appliances can be some of the biggest countertop space users.

    Think about your toaster, blender, air fryer, stand mixer, slow cooker, and food processor.

    Instead of giving every appliance a permanent spot, group them by how frequently you use them.

    Daily-use appliances: Keep accessible, with enough room to operate them safely.

    Weekly-use appliances: Store in an easy-to-reach cabinet or pantry shelf.

    Occasional-use appliances: Place in less frequently accessed storage, provided they can be lifted safely.

    Don’t put heavy appliances on high shelves or store them somewhere that makes them difficult to retrieve.

    You should also follow each appliance manufacturer’s ventilation, clearance, and operating instructions. Some appliances need open space around them when in use.

    A little planning can free up a surprising amount of counter space without making everyday cooking inconvenient.

    8. Use Vertical Storage Carefully

    When floor and cabinet space are limited, vertical storage can help.

    Depending on your kitchen layout, useful options may include:

    • Wall-mounted shelves
    • Magnetic spice organizers
    • Hooks for lightweight kitchen accessories
    • Cabinet-door organizers
    • A narrow shelf for frequently used items

    However, more storage isn’t always better.

    Too many shelves, baskets, and hanging accessories can make a small kitchen look visually busy. Keep the most frequently used items accessible and avoid placing heavy or breakable objects where they could fall.

    If you’re renting, look for suitable removable solutions, but always check the manufacturer’s weight limits and installation requirements.

    Choose one or two vertical storage solutions that address an actual problem rather than filling every available wall.

    9. Reduce Visual Clutter Without Sacrificing Function

    A kitchen can be clean and still look cluttered.

    This often happens when too many unrelated objects compete for attention: mismatched containers, packaging, decorative items, appliances, and small accessories.

    You don’t need to buy matching containers for everything.

    Instead, try these simple changes:

    • Group similar items together.
    • Keep decorative objects to a minimum.
    • Store duplicate supplies out of sight.
    • Use one tray to contain a small group of everyday essentials.
    • Choose a consistent look for any storage that remains visible.
    • Leave some counter space completely empty.

    If you enjoy decorating your kitchen, keep one or two items you genuinely love. The goal is not to remove personality from your home. It’s to make the space feel intentional.

    10. Create a Five-Minute Kitchen Counter Reset

    The easiest way to keep counters clutter-free is to make resetting them part of your routine.

    You don’t need to reorganize the entire kitchen every evening.

    Try this five-minute reset:

    Minute 1: Put away food, ingredients, and items left over from cooking.

    Minute 2: Return appliances and utensils to their designated places.

    Minute 3: Move mail, keys, and unrelated belongings to their proper homes.

    Minute 4: Wash or put away dishes and clear the sink area.

    Minute 5: Wipe the counters and leave your main preparation area clear.

    The routine works best when every item already has a convenient place to go.

    If putting something away takes too many steps, reconsider where you’re storing it.

    The best organization system is one you can maintain even on a busy day.

    Slim white rolling kitchen storage cart beside a refrigerator, organizing pantry essentials

    What to Buy to Keep Kitchen Counters Clutter-Free

    If you’ve tried decluttering but still struggle with limited space, a few carefully chosen products may help.

    Here are the most useful categories to consider:

    1. Cabinet shelf risers: Help you make better use of vertical space inside cabinets.
    2. Adjustable drawer dividers: Keep utensils and small kitchen tools separated.
    3. Compact sink caddy: Keeps dishwashing essentials contained.
    4. Small countertop tray: Groups a few frequently used items into one defined area.
    5. Under-sink organizer: Makes cleaning supplies easier to access.
    6. Magnetic spice organizer: Can free up cabinet or counter space when compatible with your kitchen.
    7. Slim rolling cart: Provides additional storage if you have a suitable gap and enough clearance.
    8. Vertical cutting-board organizer: Keeps boards and baking sheets organized inside a cabinet.
    9. Compact dish-drying rack: Helps manage dishes in kitchens without much counter space.
    10. Drawer storage containers: Keep small accessories organized without adding more items to the countertop.

    The goal isn’t to buy all ten. Choose the products that solve the problems you actually have.

    Common Mistakes That Make Kitchen Counters Cluttered Again

    Even a well-organized kitchen can become messy if the underlying habits don’t change.

    Watch out for these common mistakes:

    Buying organizers before decluttering. You can end up creating more storage for items you don’t need.

    Keeping everything within reach. Convenient access doesn’t mean every item needs to remain visible.

    Choosing storage that is difficult to use. If an organizer is awkward to access, you’re less likely to put things away.

    Ignoring the source of the clutter. Mail, bags, and personal belongings need their own designated homes.

    Trying to make every surface decorative. Empty workspace is useful, especially in a small kitchen.

    Creating a system that requires too much effort. The simpler it is to reset your kitchen, the more likely you are to maintain it.

    Frequently Asked Questions

    How do I keep my kitchen counters clutter-free in a small kitchen?

    Start by removing items you rarely use, storing appliances according to how frequently you need them, and assigning everyday essentials a designated home. Use cabinet space efficiently before adding more organizers.

    What should I keep on my kitchen counters?

    Keep items you use frequently and that benefit from being accessible, such as a daily-use coffee maker or a compact utensil holder. The right selection depends on your cooking habits and available workspace.

    How can I organize kitchen counters without buying anything?

    Remove unrelated belongings, return unused appliances to cabinets, group similar items, and establish a simple daily reset. Rearranging existing cabinet storage can also free up space.
    What products help organize a small kitchen?

    Shelf risers, drawer dividers, compact sink caddies, vertical organizers, and slim rolling carts can help when they fit the available space and solve a specific storage problem.

    How do I stop clutter from returning to my kitchen counters?

    Give every frequently used item a convenient place, create a separate home for mail and personal belongings, and spend a few minutes resetting the kitchen each day.

    Final Thoughts

    Keeping your kitchen counters clutter-free isn’t about having a perfectly styled kitchen or hiding everything you own.

    It’s about making your kitchen easier to use.

    When everyday essentials have a place, cabinets work efficiently, and unrelated belongings stay off your counters, even a small kitchen can feel more spacious and functional.

    Start with one area that frustrates you most. Clear it, create a simple system, and only buy an organizer if you genuinely need one.

    You may find that the best kitchen upgrade isn’t a renovation at all. It’s reclaiming the workspace you already have.

    Shop the Home Finds

    Looking for practical ways to make your kitchen work better? Explore these organization solutions:

    This post may contain affiliate links. If you purchase through these links, Home Finds Studio may earn a commission at no additional cost to you.

  • 5 Easy Ways to Style a Modern Vase in Your Home

    5 Easy Ways to Style a Modern Vase in Your Home

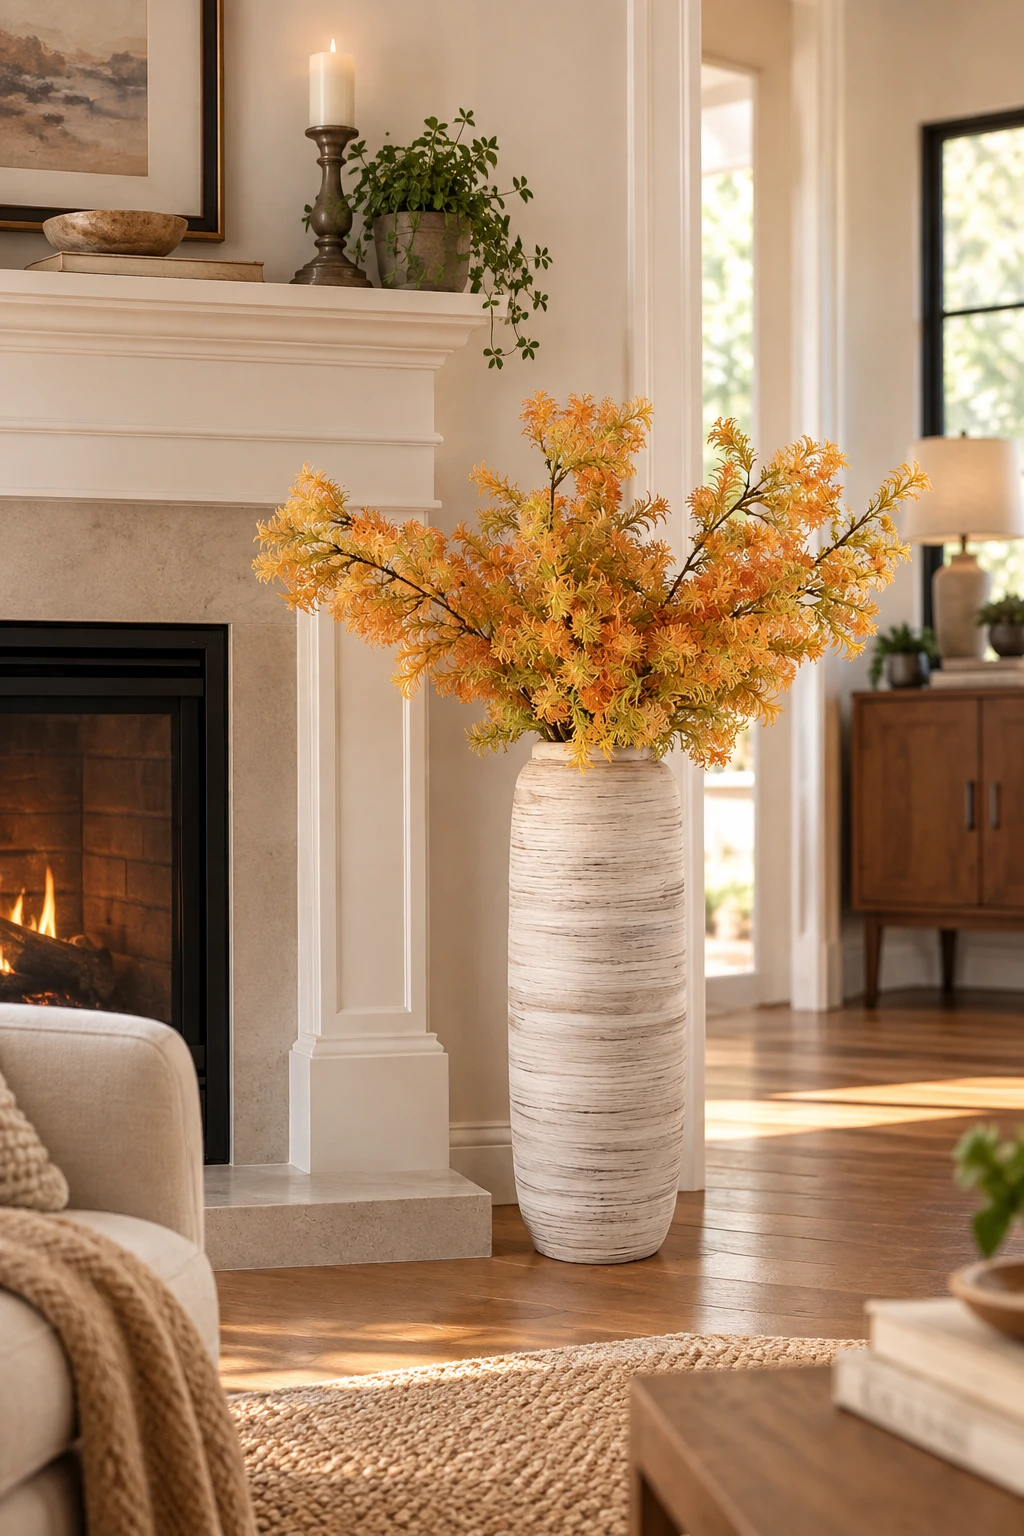
    Editorial image for inspiration. Product appearance may vary.

    Affiliate Disclosure: Home Finds Studio is a participant in the Amazon Services LLC Associates Program. As an Amazon Associate, we earn from qualifying purchases — at no extra cost to you.

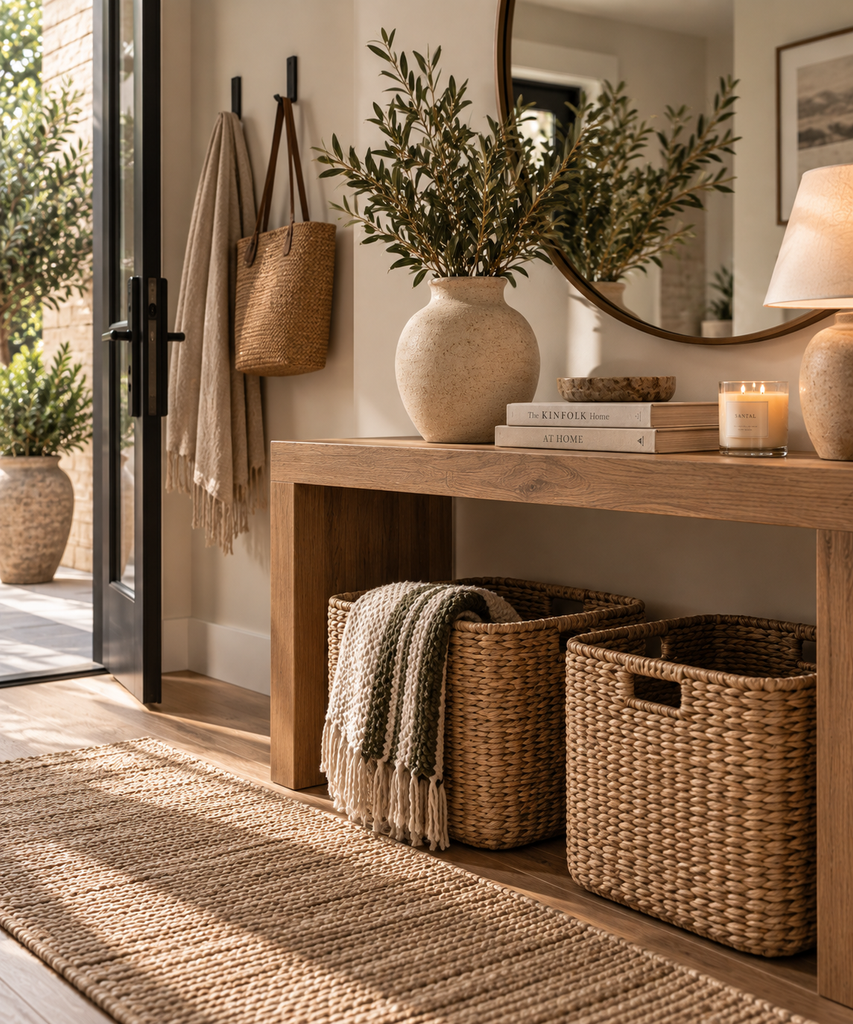
    A vase can be so much more than a container for flowers. A modern vase with a simple, sculptural shape can act as a focal point on an entryway table, a dining table, an open shelf or a coffee table, and it instantly makes a corner of the room feel more finished.

    The best part is that you don’t need an elaborate floral arrangement to make it work. A few fresh flowers, dried stems, a couple of branches or a bit of greenery is plenty, and sometimes the vase looks great completely on its own as a decorative object. That makes modern vase decor one of the easiest, most affordable ways to refresh a room.

    Here are five easy ways to style a modern vase around your home, plus a few simple tips to keep the look balanced and seasonal.

    1. Style It on an Entryway Table

    The entryway is the first thing people see, so a small vignette here sets the tone for the whole home. Place your vase to one side of the console and fill it with a few natural branches for height and movement. Then keep the rest of the surface quiet.

    A few ideas that work well together:

    • A small tray or key bowl to catch everyday items
    • A candle in a simple holder
    • A decorative book laid flat or stacked under the vase

    Entryway decor works best with only a few visual elements. If the table starts to feel crowded, remove one item. You can find more ideas for creating a welcoming, elevated look in our guide to making your home look more elegant without spending a fortune.

    2. Create a Simple Dining Table Centerpiece

    A dining table centerpiece doesn’t have to be complicated. One vase in the middle of the table can make an everyday meal feel a little more intentional, without taking up much space.

    Some easy options to fill it with:

    • Fresh flowers in a soft, seasonal palette
    • A few stems of eucalyptus
    • Seasonal branches, such as autumn leaves or bare twigs
    • Dried stems for a low-maintenance arrangement

    Keep the arrangement low enough that guests can still see each other across the table. If you’re planning the rest of the room, these dining room decor ideas pair nicely with a simple centerpiece.

    3. Give a Coffee Table a Softer Look

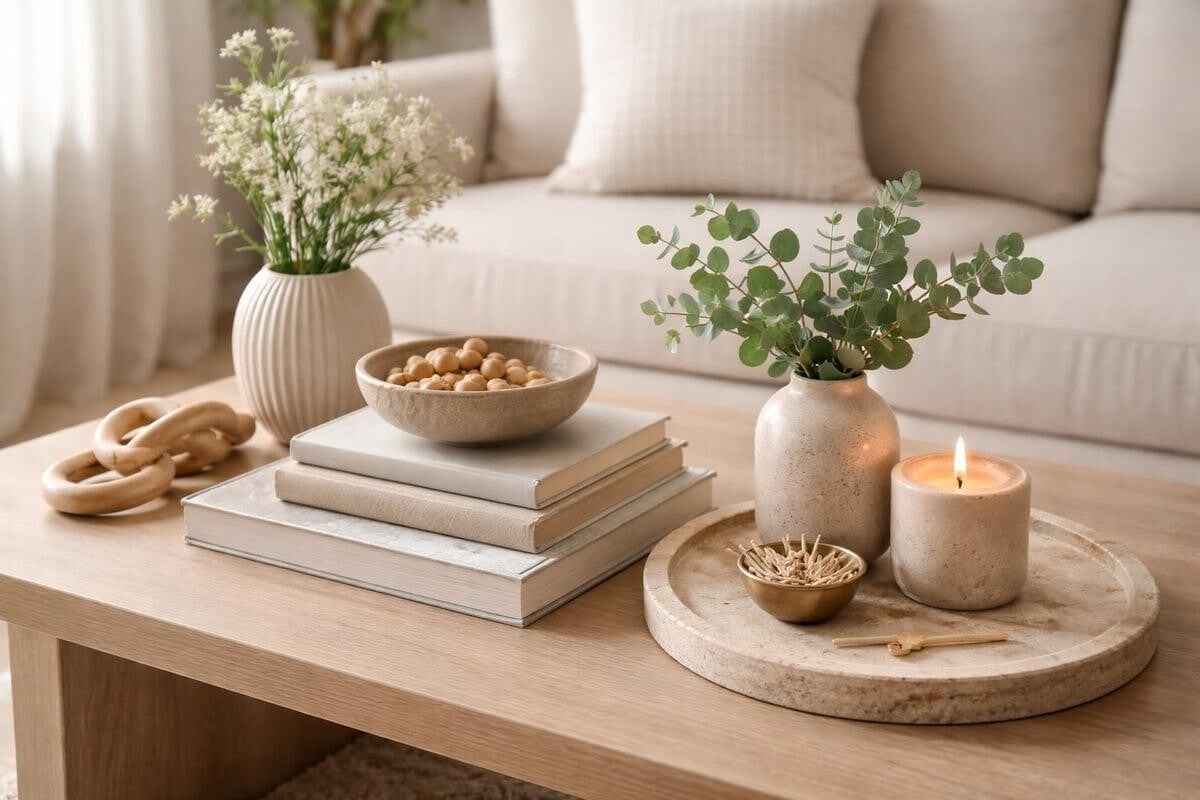
    Living room decor often benefits from a soft, organic touch, and a vase on the coffee table is an easy way to add one. Set it on top of a stack of coffee table books or beside a small tray so it feels grouped rather than scattered.

    To keep the composition balanced, combine only a few items:

    • Two or three coffee table books
    • A small tray to anchor the display
    • A candle
    • Something with natural texture, like a wooden bowl or woven coaster

    Leave some of the tabletop open so there’s still room for a mug or a remote. If your space is on the smaller side, our small living room ideas have more ways to keep things feeling light.

    4. Add Height to an Open Shelf

    Shelf styling is mostly about variety. A vase brings height and a different shape to a shelf that might otherwise be full of horizontal books and small objects.

    Try combining it with:

    • Books, stacked and standing
    • Framed art leaning against the back
    • Small decorative objects like a bowl or a candle
    • A little greenery to soften the lines

    A simple rule is to mix heights. Place the tallest piece slightly off-center, add a medium item next to it and a low item on the other side, so your eye moves along the shelf instead of stopping at one point.

    5. Let the Vase Be the Decor

    A modern vase doesn’t always need flowers. If the silhouette is interesting, it can stand on its own as a decorative object on a sideboard, console or bookshelf, and it looks intentional even when empty.

    Styling it this way is also the lowest-effort option. There’s nothing to water or replace, and you can add a few stems when you feel like it. It’s an easy way to change your decor with the seasons too: leave it bare in summer, add dried stems in autumn, or fill it with branches in winter.

    Simple Styling Tips for a Modern Vase

    1. Keep the arrangement simple. A few stems usually look better than a full bouquet.
    2. Mix heights. Vary the height of your vase, books and accessories.
    3. Use natural textures. Wood, linen, ceramic and woven pieces soften a modern look.
    4. Repeat one color from the room. Echo a pillow, rug or art color for a cohesive feel.
    5. Leave some empty space. Negative space helps minimalist home decor feel calm.
    6. Change stems seasonally. New stems refresh the whole space without buying new decor.

    If you like a calm, edited look, our post on minimalist luxury home finds has more inspiration.

    A Modern Vase for Everyday Home Styling

    A modern vase can be one of those simple decorative pieces that works across several rooms and seasons. The ALMA vase is designed to fit naturally into modern, minimalist, Scandinavian and contemporary interiors, making it an easy piece to consider for everyday styling.

    Check the Amazon listing for current details such as size, material and color options before you decide.

    Final Thoughts

    Decorating well doesn’t always mean adding more things. A single vase, placed thoughtfully, can bring height, texture, color and visual interest to an entryway, a dining table, a coffee table or a shelf. Start with one spot, keep the styling simple and adjust with the seasons.

    If you’re looking for a modern vase to try in your own home, you can see the ALMA vase on Amazon.

  • 7 Cute Halloween Bathroom Ideas for Kids

    7 Cute Halloween Bathroom Ideas for Kids

    Editorial image for inspiration. Product appearance may vary.

    Affiliate Disclosure: Home Finds Studio is a participant in the Amazon Services LLC Associates Program. As an Amazon Associate, we earn from qualifying purchases — at no extra cost to you.

    Halloween doesn’t have to stop at the living room, the front porch or the kitchen counter. The kids’ bathroom is a fun place for a little seasonal charm too, and it’s one of the easiest rooms to decorate because a few small touches go a long way.

    You don’t need a full makeover to create cute Halloween bathroom ideas for kids. Textiles, small accessories and a themed bath mat in orange, black, white and cream can change the mood of the room quickly, with nothing spooky or scary. Everything below is playful, budget-friendly and easy to pack away when the season ends.

    We’ll also look at how the bathroom can become part of a “boo basket,” the sweet little Halloween surprise many parents put together for their kids.

    1. Start With a Cute Halloween Bath Mat

    If you only add one thing to a kids Halloween bathroom, make it the bath mat. It sits right in the tub, it’s one of the first things little ones notice at bath time, and it sets the mood without a single hook in the wall.

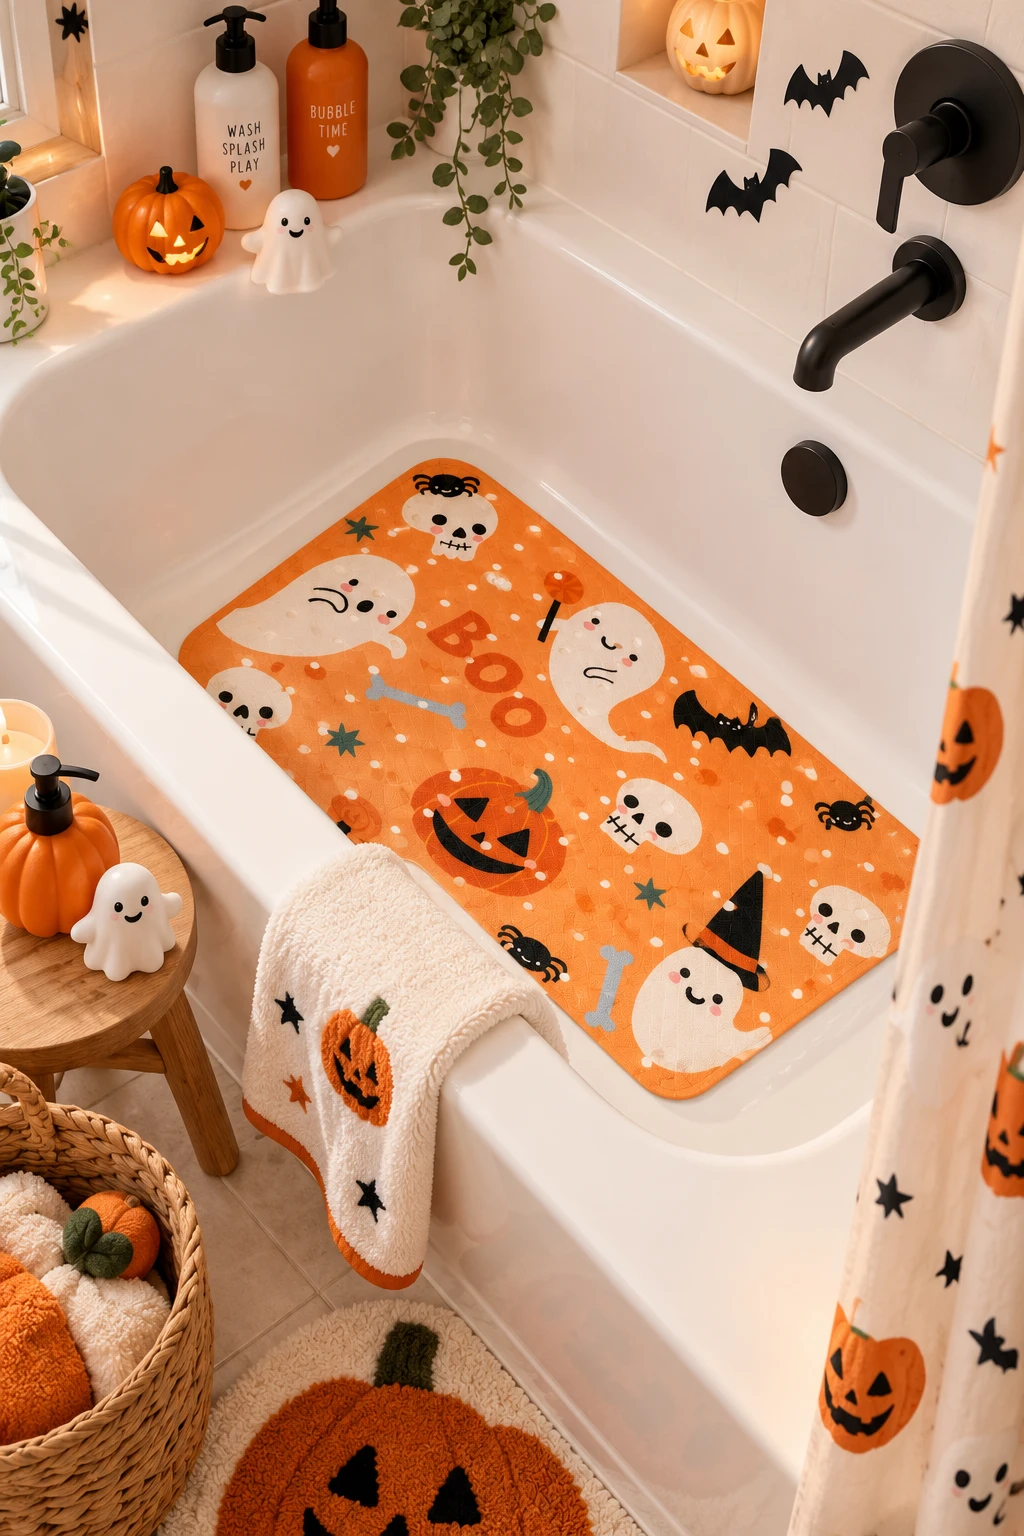
    The Homerella Halloween Bath Mat is a simple way to bring a Halloween bath mat into the room. It has a playful, kid-friendly Halloween design with ghosts, pumpkins and bats, in a fun style that leans cute rather than creepy. Here’s what the listing highlights:

    • Size: 28 x 16 inches
    • Halloween design with ghosts, pumpkins and bats
    • BPA-free, non-toxic material
    • 2 drying hooks included
    • Designed with a non-slip grip

    The two hooks make it easy to hang the mat up to dry between baths, which keeps the tub looking tidy. As with any bath accessory, follow the usage and care instructions on the listing and keep bath time supervised.

    2. Add Friendly Halloween Towels

    Hand towels are one of the easiest ways to add Halloween color, and they’re simple to swap in and out. Look for friendly designs with pumpkins, ghosts, bats or black cats rather than anything dark or dramatic.

    A simple palette keeps the look polished: orange, black, white and cream. Cream or white towels with small orange and black details feel festive but still fit a calm, modern space, which makes them a nice starting point for kids bathroom decor.

    You don’t need a whole stack, either. One or two seasonal towels, hung by the sink or folded on a small shelf, are plenty to make the room feel ready for October.

    3. Create a Little Halloween Sink Station

    The sink is where kids spend a lot of their bathroom time, from brushing teeth to washing hands, so it’s a great spot for a mini Halloween moment. A little sink station can include:

    • A Halloween soap dispenser
    • A cute toothbrush holder
    • A small pumpkin accent
    • A Halloween hand towel

    Two or three well-chosen pieces are enough. Too many small items can crowd the counter, and good Halloween bathroom decor should still be easy to wipe down and use every day.

    4. Add a Playful Shower Curtain

    A themed shower curtain can become the main visual moment in the room, especially in a small bathroom where the curtain is the biggest surface you see. Look for friendly ghosts, pumpkins, bats or simple Halloween patterns in your orange, black, white and cream palette.

    Keep the mood sweet rather than spooky: smiling ghosts, tiny bats and cheerful pumpkins work better here than anything scary or dramatic. If a full Halloween curtain feels like too much, a plain white or cream curtain paired with a festive bath mat and towels creates a softer look. Just check the size and material details on the listing so the curtain suits your tub.

    5. Make a Small Halloween Bath Toy Corner

    For toddlers and young kids, bath toys are half the fun. A few autumn or Halloween-themed toys, like little pumpkins, ghosts or bats, can make bath time feel like part of the holiday.

    The trick is keeping the space organized. Choose one basket, mesh bag or caddy for the toys so the corner looks intentional instead of cluttered, and pick a small set rather than a big pile. If you want more storage ideas, our list of home organization products you’ll actually use is a good place to start.

    6. Add a Few Easy Halloween Accessories

    Small accessories are where Halloween decorating ideas for kids get the most playful, and they’re the easiest pieces to put away afterward. A few ideas for Halloween bathroom decor for kids:

    • A small pumpkin (real, faux or ceramic)
    • A friendly ghost decoration
    • A Halloween storage basket for towels or toys
    • Cute wall art with sweet Halloween characters
    • A seasonal hand towel

    Because everything is small, you can tuck it all into one bin on November 1st and pull it out again next year. And if the kitchen is your next seasonal project, these kitchen organization products that save space can help you make room for treats and party supplies.

    7. Turn the Bathroom Into Part of a Halloween Boo Basket

    A “boo basket” is a sweet Halloween tradition: a basket of small surprises, often left at the door with a “you’ve been booed” note in the days before Halloween. It’s usually candy, little toys and seasonal goodies.

    Bath time items are a fun, practical way to include the bathroom. A few ideas:

    • A Halloween bath mat
    • A couple of bath toys
    • A Halloween toothbrush
    • A cute towel
    • A small self-care item, like a kid-friendly bubble bath

    There’s no rule about what goes in a boo basket, so choose what suits your family and your budget. A bath mat is just one idea, but it can be a nice way to get kids excited about October bath time.

    A Cute Halloween Upgrade for the Kids’ Bathroom

    Homerella Halloween Bath Mat

    If you want one simple piece to make the kids’ bathroom feel more festive for Halloween, a themed bath mat is an easy place to start. The Homerella Halloween bath mat features a playful design with ghosts, pumpkins and other kid-friendly Halloween details, making it a fun seasonal addition without requiring a complete bathroom makeover.

    • 28 x 16 inches
    • Cute Halloween design with ghosts, pumpkins and bats
    • BPA-free, non-toxic material
    • 2 drying hooks included
    • Designed with a non-slip grip

    Make Halloween Fun, Not Scary

    You don’t need to transform the whole bathroom to make Halloween feel special for your kids. A themed bath mat, a couple of friendly towels, a few small accessories and some playful Halloween accents are enough to turn an everyday space into a little October treat that’s cute, colorful and not scary at all. Pick two or three of these ideas, start small, and add more only if you feel like it. Everything is easy to pack away when November arrives. When you’re ready to begin with the mat, you can see the Homerella Halloween Bath Mat on Amazon.

  • How to Store Rice in Your Pantry: 7 Smart Rice Storage Ideas

    How to Store Rice in Your Pantry: 7 Smart Rice Storage Ideas

    Editorial image for inspiration. Product appearance may vary.

    Home Finds Studio is a participant in the Amazon Services LLC Associates Program. As an Amazon Associate, we earn from qualifying purchases — at no extra cost to you.

    Rice is one of those pantry staples that can quickly become difficult to organize, especially when you buy it in larger quantities.

    Large bags can take up valuable shelf space, make it harder to see how much you have left, and aren’t always convenient when you’re cooking.

    The good news is that you don’t need to completely redesign your pantry to make rice storage easier.

    Here are 7 practical rice storage ideas that can help create a cleaner, more organized kitchen.

    1. Use a Dedicated Rice Dispenser

    One of the simplest ways to organize rice is to give it a dedicated storage container instead of keeping it in a large bag.

    A rice dispenser can make it easier to portion rice while keeping the pantry looking more organized.

    Lifewit Rice Dispenser

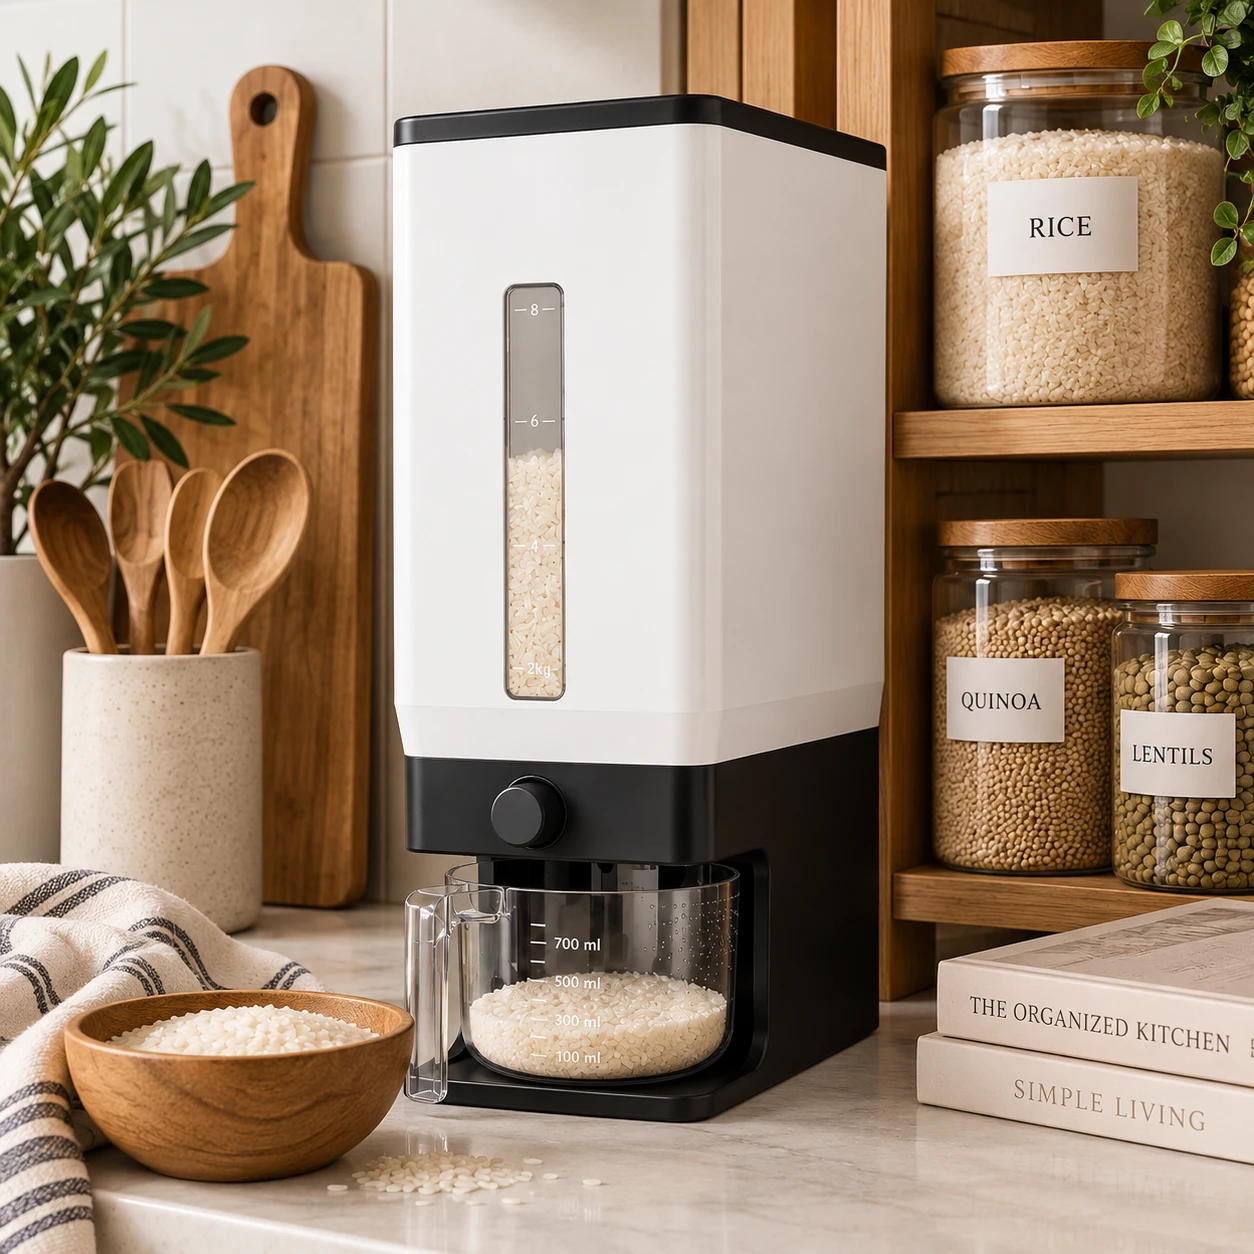
    The Lifewit Rice Dispenser is designed to hold up to 25 pounds of rice or other dry grains, making it particularly useful for households that buy rice in larger quantities.

    Its dispensing design allows you to release rice using a button instead of repeatedly opening and scooping from a large bag.

    The container also includes a clear viewing window and a measuring cup, so you can see how much rice remains and portion it more easily.

    The included cup also has small holes designed to help with rinsing rice.

    Before you order, check the product dimensions on the Amazon listing (it currently lists about 13 x 6 x 16.8 inches) and measure the counter or pantry space where you plan to keep it, including the height under any shelf or cabinet.

    Best for: families, bulk rice storage, and kitchens where counter or pantry organization matters.

    2. Keep Rice in One Dedicated Storage Area

    Instead of storing different bags of rice throughout the pantry, create one dedicated area for rice and other frequently used grains.

    This makes it easier to find what you need when cooking and gives your pantry a more intentional layout. For more ideas beyond the pantry, see our guide to kitchen organization products that actually save space.

    You can keep rice alongside quinoa, beans, lentils, or other dry staples that you use regularly.

    3. Store Bulk Rice in a Sealed Container

    If you purchase rice in larger quantities, transferring it from the original packaging into a suitable storage container can make the pantry feel much less cluttered.

    Look for containers with secure lids that help protect dry foods from moisture and pantry pests.

    A clear container can also make it easier to see when you’re running low.

    4. Create a Small Rice Station

    If rice is something you cook frequently, consider creating a small “rice station” in your kitchen or pantry.

    Keep the rice dispenser or container together with other items you use when preparing rice, such as your measuring cup or favorite cooking tools.

    This small change can make meal preparation feel much more streamlined.

    5. Take Advantage of Vertical Pantry Space

    Pantry shelves can quickly become crowded when bulky food packages are stacked on top of one another.

    Using containers with a compact footprint can help you make better use of vertical space.
    Instead of spreading several bags across a shelf, group your dry staples together and organize them by how frequently you use them.

    6. Label Your Dry Goods

    Labels can make a surprisingly big difference in a pantry.

    If you store several grains or dry ingredients in similar containers, simple labels can help you quickly identify rice, quinoa, beans, pasta, and other staples.

    For a cohesive look, use the same label style throughout the pantry. If you want more label-friendly storage, browse our roundup of home organization products you’ll actually use.
    7. Make Your Rice Storage Easy to Maintain
    The best pantry organization system isn’t necessarily the most complicated one.

    It should be easy to refill, easy to clean, and easy to use every day.

    Keep frequently used foods within easy reach and reserve less frequently used ingredients for higher or less accessible shelves.

    Small systems that fit naturally into your cooking routine are often easier to maintain over time.

    Rice Storage Ideas: How to Choose the Right Solution

    The best rice storage method depends on how much rice you normally buy and how frequently you use it.

    If you buy rice in bulk: Look for a larger dedicated container or dispenser.

    If you have limited pantry space: Prioritize compact storage that makes efficient use of shelf space.

    If you cook rice frequently: Choose a system that makes portioning quick and convenient.

    If you want a cleaner-looking pantry: Use coordinated containers and simple labels.

    If you want to reduce clutter: Keep frequently used dry goods together in one organized area.

    A More Organized Pantry Starts With Small Changes

    You don’t have to reorganize your entire kitchen to make your pantry more functional.

    Sometimes, simply giving everyday staples like rice a dedicated storage system can make cooking and cleanup feel easier.

    Whether you use a rice dispenser, a sealed container, or a simple labeled storage bin, the goal is to create a system that works naturally with the way you use your kitchen. If your fridge could use the same treatment, our fridge organization aesthetic guide is a good next step.

  • 7 Smart Stuffed Animal Storage Ideas for a Clutter-Free Kids’ Room

    7 Smart Stuffed Animal Storage Ideas for a Clutter-Free Kids’ Room

    Editorial image for inspiration. Product appearance may vary.

    Home Finds Studio is a participant in the Amazon Services LLC Associates Program. As an Amazon Associate, we earn from qualifying purchases — at no extra cost to you.

    Stuffed animals are adorable—until they start taking over the floor, bed, and every available corner of a child’s room.

    If you’re looking for simple kids’ room organization ideas, you don’t necessarily need a bigger room or an expensive storage system. A few smart storage solutions can make a surprisingly big difference.

    From wall-mounted hammocks to baskets and under-bed storage, these stuffed animal storage ideas can help keep favorite toys accessible while making the room feel calmer and more organized.

    1. Try a Macramé Stuffed Animal Hammock

    A stuffed animal hammock is one of the easiest ways to take plush toys off the floor without completely hiding them.

    A wall-mounted hammock can turn an unused corner of the room into dedicated toy storage while keeping favorite stuffed animals visible and easy to grab.

    Our Pick: TIDYTEDS Macramé Toy Hammock

    The TIDYTEDS macramé toy hammock is designed for storing stuffed animals and creating a more organized kids’ space. Its macramé look can also complement neutral, cozy, and minimalist room decor.

    Best for: kids’ bedrooms, playrooms, and rooms where floor space is limited.

    2. Use Large Woven Baskets

    Large woven baskets are a classic solution for stuffed animals because they’re easy for children to use.

    Instead of organizing every plush toy individually, simply place them inside the basket. This creates a designated home for toys while keeping cleanup simple.

    Look for baskets with wide openings so children can easily see and grab their favorites.

    Best for: quick cleanup and younger children.

    3. Make Use of Under-Bed Space

    If your child’s room doesn’t have much storage, don’t overlook the space underneath the bed.

    Low-profile storage containers can hold stuffed animals that aren’t played with every day. This keeps seasonal or less-used toys out of sight while leaving the main room less cluttered.

    Tip: Keep the plushies your child uses most often somewhere more accessible and reserve under-bed storage for the rest.

    4. Add Open Toy Bins

    Open bins make cleanup much easier because children don’t have to deal with complicated lids or containers.

    You can dedicate one bin to stuffed animals and use others for books, dolls, cars, or building toys.

    For a cohesive look, choose bins that complement the room’s existing colors and materials.

    5. Use an Empty Corner

    That awkward empty corner in a child’s bedroom can become useful storage.

    A corner hammock, tall basket, or compact shelving unit can transform unused space into a dedicated area for stuffed animals.

    This is particularly helpful in small kids’ rooms, where every square foot matters.

    Design tip: Instead of trying to hide every toy, choose storage that looks intentional and complements the room.

    6. Create a Low Toy Storage Zone

    For younger children, accessibility is just as important as organization.

    Create a low storage zone where your child can independently reach their favorite stuffed animals. Open baskets, low shelves, or floor-level bins work well for this purpose.

    The goal isn’t perfect organization—it’s making it easy to put toys away.

    7. Rotate the Stuffed Animals

    Sometimes the best storage solution is simply having fewer toys out at once.

    Keep a portion of the stuffed animals stored away and rotate them every few weeks. This can make the room easier to maintain and make older toys feel new again when they return.

    A rotation system can also work well with under-bed containers or closet storage.

    How to Store Stuffed Animals in a Small Kids’ Room

    When floor space is limited, the best stuffed animal storage solutions use areas that would otherwise go unused.

    • Use vertical space: A wall-mounted toy hammock can keep plush toys off the floor while leaving them visible.
    • Choose one large basket: A woven basket beside a bookshelf or bed creates a simple place for everyday favorites.
    • Store less-used toys under the bed: Low-profile containers can keep seasonal or rarely used plush toys out of the way.
    • Keep favorite toys within reach: Place the toys your child uses most often in an accessible basket or low storage bin.

    You don’t need to display every stuffed animal at once. Keeping a manageable selection available and rotating the rest can make a small room easier to maintain.

    How to Choose the Best Stuffed Animal Storage Ideas

    The right solution depends on your child’s room and how the toys are used.

    • For small rooms: Choose vertical or wall-mounted storage.
    • For easy cleanup: Use large baskets or open bins.
    • For toys that aren’t used every day: Consider under-bed or closet storage.
    • For a decorative approach: Choose storage made from materials such as natural woven fibers or macramé.
    • For younger children: Prioritize storage that they can reach independently.

    The best system is ultimately the one that makes cleanup easy enough that everyone actually uses it.

    A More Organized Kids’ Room Doesn’t Have to Be Complicated

    Stuffed animals don’t have to disappear into a closet to keep a bedroom looking tidy.

    With the right storage approach, they can become part of the room’s decor while still having a designated place to live.

    Whether you choose a macramé hammock, a large woven basket, or simple open bins, the goal is the same: less floor clutter and an easier cleanup routine.

    And sometimes, one small organizational change is all it takes to make a child’s room feel much more manageable. If you’re ready to tackle other rooms too, browse our full list of home organization products.

  • 10 Best Amazon Labor Day Deals for a Fall Home Refresh

    Labor Day is the perfect time to give your home a cozy little refresh before fall arrives. 🍂 You don’t need to completely redecorate—adding a few warm textures, earthy tones, and simple home accents can make your space feel instantly more inviting.

    If you’re looking for affordable Amazon home finds to transition your space into the new season, these 10 Labor Day deals are worth checking out. From cozy throws and warm lighting to natural wood accents and Japandi-inspired decor, these pieces can help you create a home that feels calm, comfortable, and ready for fall.

    1. Cozy Throw Blankets

    A cozy throw blanket is one of the easiest ways to make your home feel warmer for fall. Look for soft textures like chunky knit, waffle, cotton, or fleece in cream, beige, terracotta, or sage. Drape one over your sofa or accent chair to add comfort and a touch of cozy fall decor without changing the entire room.

    2. Warm Table & Floor Lamps

    As the days get shorter, warm lighting can instantly make a room feel more inviting. A minimalist table lamp or floor lamp with a soft, warm glow is perfect for creating a cozy fall atmosphere. Look for simple shapes, linen shades, natural wood, or charcoal finishes that complement a Japandi-inspired home.

    3. Neutral Decorative Pillows

    Swapping in a few pillow covers is a small change that makes a big difference for a fall home refresh. Stick to a calm mix of cream, charcoal, and warm brown, and combine textures like boucle, linen, and cotton for quiet contrast. Because the covers store flat, you can rotate them each season without needing room for bulky pillows.

    4. Faux Olive Trees & Minimal Greenery

    A single faux olive tree in a quiet corner brings a little life to a room with none of the upkeep of a real plant. Japandi home decor leans on a few natural shapes rather than a lot of greenery, so one tree or a simple branch in a vase is usually enough. Look for realistic leaves and a neutral pot in cream, charcoal, or warm clay.

    5. Wooden Serving Trays

    A wooden serving tray is one of those pieces that is genuinely useful and still calming to look at. Use one to gather candles and a small vase on the coffee table, or to carry tea to the sofa on a slow autumn morning. The warm wood grain adds the natural texture that makes cozy home decor feel intentional rather than bare.

    6. Ceramic Vases & Earth-Tone Decor

    Matte ceramic vases in terracotta, sand, and off-white are an easy way to bring fall colors into a room. Group a few in different heights on a shelf or mantel, and feel free to leave some empty; in Japandi styling, the shape of the piece matters as much as what is in it. As far as Amazon home decor goes, these are year-round pieces worth choosing well.

    7. Textured Area Rugs

    A rug in wool, jute, or a wool blend warms up bare floors just as the weather turns. Keep the color soft, such as cream, greige, or muted brown, and let the texture carry the interest. A grounding rug pulls a cozy living room together and softens sound, which adds to that settled, hushed feeling.

    8. Candle Holders & Flameless Candles

    Candlelight is shorthand for cozy, and fall is when it really earns its place. Simple wood, ceramic, or matte metal holders suit a Japandi look, and flameless candles are a practical choice if you have pets or little ones at home. Cluster a few on a tray or along a shelf for warm light with no fuss.

    9. Cozy Bedding Upgrades

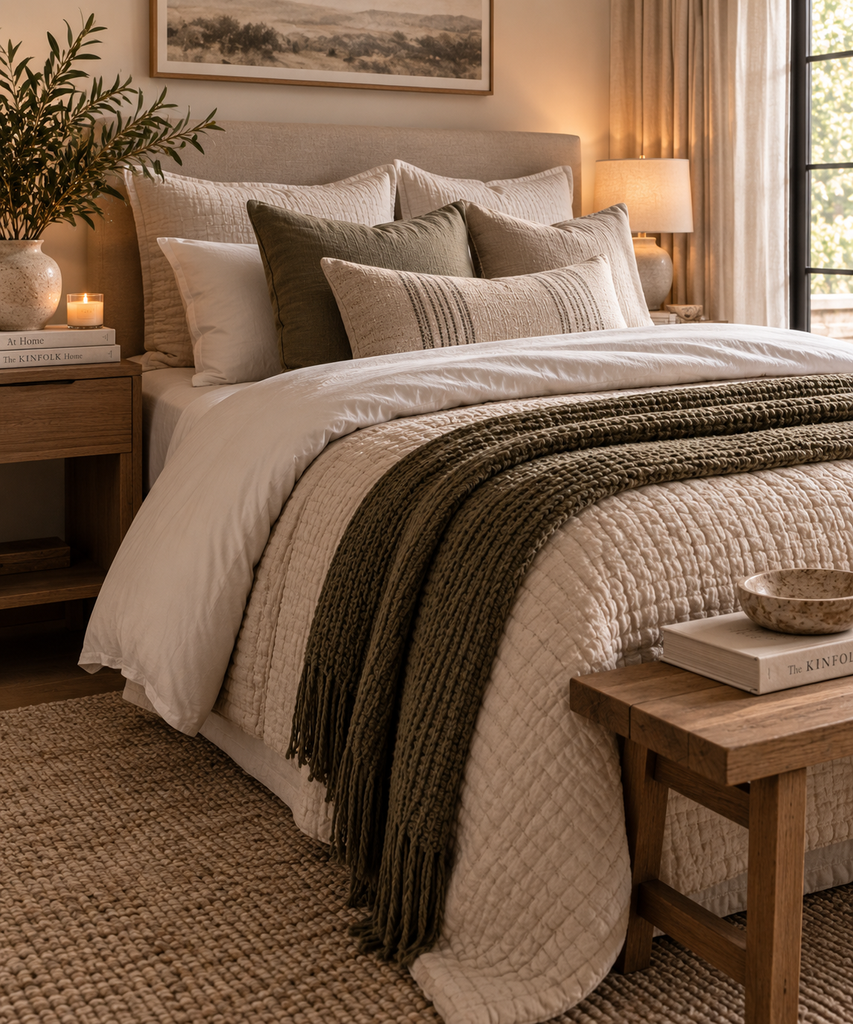
    Cooler nights are a good reason to rethink the bed. A washed cotton or linen duvet cover in a warm neutral, layered with a knit blanket at the foot, makes the whole room feel like a retreat. Neutral bedding keeps the space restful and works easily with the rest of your fall decorating ideas.

    10. Entryway & Storage Baskets

    Woven baskets handle the autumn pile-up of blankets, shoes, and extra layers while still looking soft and natural. A large basket by the door or beside the sofa keeps everyday clutter out of sight without a plastic bin anywhere. In a Japandi home, storage that looks good left out in the open is part of what keeps rooms calm.

    Create a Cozy Fall Home Without Overdoing It

    You don’t need to redecorate to make your home feel ready for fall. The best fall home decor usually starts small: one or two pieces you will actually use every day, like a throw you reach for each evening or a lamp that softens the room, and the space grows from there. A slower, more intentional approach fits the Japandi spirit and is gentler on your budget.

    If you’re planning a fall home refresh this year, take a look at the featured Amazon home finds below. A few well-chosen pieces of Amazon home decor from the Labor Day deals can carry your space warmly through the season.

    As an Amazon Associate I earn from qualifying purchases.

  • Fridge Organization Aesthetic: 15 Ideas to Make Your Fridge Instagram-Worthy

    Fridge Organization Aesthetic: 15 Ideas to Make Your Fridge Instagram-Worthy

    Home Finds Studio is a participant in the Amazon Services LLC Associates Program. As an Amazon Associate, we earn from qualifying purchases — at no extra cost to you. We only feature products we genuinely love.

    Your refrigerator doesn’t have to be the forgotten corner of your kitchen. With a clean-out, a few clear organizers and a system you can actually keep up, you can build a fridge organization aesthetic that looks calm and put-together every time you open it — no expensive kitchen required.

    Here are 15 fridge organization ideas, grouped so you can start with the messiest zone and build from there, plus the organizers worth buying and answers to the questions people ask most.

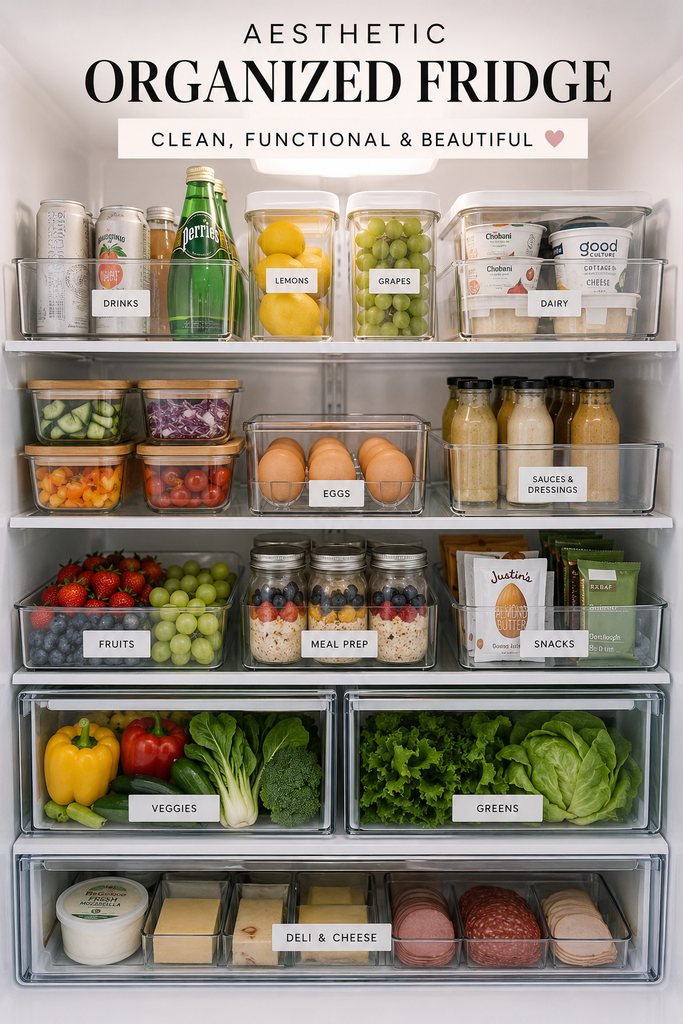
    Aesthetic organized fridge with clear bins, labeled zones, fresh produce and neatly arranged food storage

    Start With a Clean, Contained Base

    The first eight ideas reset the fridge and give every kind of food a container it belongs in.

    1. Start With a Deep Clean

    What: empty the fridge completely before buying a single organizer. How: pull the shelves and drawers, wash them in warm soapy water, wipe the interior with a little dish soap or a 1:3 vinegar-water mix, and dry before everything goes back. Tip: do it the day before grocery day, when the fridge is naturally emptiest.

    2. Sort Packaged Food Into Clear Fridge Bins

    What: group loose packages into a few open-top bins by how you use them — breakfast, snacks, lunch-makings, baking. How: give each bin a fixed shelf and pull the whole bin out when you cook. What to look for: open (not lidded) bins with handles; measure your shelf height and depth first, because a bin an inch too tall wastes the space above it.

    3. Set Up a Dedicated Drink Station

    What: give cans and bottles one defined spot so they stop spreading across shelves. How: a can dispenser or slim tiered rack on one shelf, favorites at the front. What to look for: a rolling can dispenser if you mostly buy cans, a two-tier rack for a mix — and check the width against your narrowest shelf.

    4. Corral Sauces on a Lazy Susan

    What: put a turntable where jars normally disappear — a deep corner or the back of a shelf. How: load it with dressings, sauces and jams and spin instead of unpacking the shelf. What to look for: a raised edge and non-slip base so jars don’t slide off, plus a couple of centimeters of turning clearance.

    5. Keep Fruit and Greens in Produce Containers

    What: move berries, greens and herbs out of clamshells and bags into containers built for produce. How: berries go in unwashed, greens with a dry paper towel, soft herbs upright in a little water. Why it’s worth it: vented produce containers can add days to the life of raspberries and spinach — this is the idea that actually saves money. What to look for: an adjustable vent and a raised colander insert so moisture drains away from the fruit.

    6. Decant Loose Food Into Matching Airtight Containers

    What: transfer food in bulky or messy packaging — deli meat, shredded cheese, opened bacon, leftovers — into matching containers. How: start with the messiest shelf, decant, add a small date label. Unlike bins (which group packages), airtight containers replace the package and keep cut fruit and deli meat fresh longer. What to look for: one system where every lid fits every base; rectangles stack better than rounds.

    7. Label Bins and Containers — Lightly

    What: add short, consistent labels so the system survives everyone else. How: label the front of each bin and the lid of decanted containers — one font, one color, a word or two. Tip: don’t label every item; that turns the fridge into a filing cabinet and nobody keeps it up. What to look for: a label maker with laminated tape that survives condensation, or pre-printed waterproof labels.

    8. Build a Grab-and-Go Snack Bin

    What: give kids (or your future self) one bin of ready-to-eat snacks at a reachable height. How: pre-portion cheese sticks, cut veg, fruit and yogurt into one open bin on a low shelf; refill weekly. Tip: putting it low means kids serve themselves and leave the rest of the fridge alone.

    Labeled clear fridge bins organizing snacks and everyday foods for easy access

    Create Zones That Actually Stay Organized

    Ideas 9 to 15 keep the reset from falling apart, with a permanent home for every category.

    9. Organize by Temperature Zones

    What: give each category a zone based on how cold that part of the fridge runs. How: ready-to-eat food and leftovers up top, dairy and eggs in the middle, raw meat on the bottom shelf (coldest, and drips can’t reach anything), produce in the drawers, condiments in the door. Tip: write the zones on a card and tape it inside a cabinet for the first month.

    10. Swap the Egg Carton for an Egg Holder

    What: replace the bulky carton with a low tray. How: keep it on the middle shelf, not the door — the door is the warmest spot and swings in temperature every time you open it. What to look for: a clear holder sized to a dozen or 18, so you can see your count and stop over-buying.

    11. Dedicate a Meal-Prep Shelf

    What: give prepped meals one shelf or one row of containers. How: matching meal-prep containers, lined up left to right in the order you’ll eat them, at eye level so you reach for them. What to look for: single-compartment containers for ingredients, divided ones for full meals; glass reheats better, plastic is lighter for lunches out.

    12. Keep the Door Minimal and Grouped

    What: stop using the door as overflow storage. How: group by type (mustards together, hot sauces together), pull duplicates, and put loose sauce packets in one small bin. Tip: only shelf-stable, high-acid things belong in the door — condiments, juice, butter. Milk and eggs don’t.

    13. Let the Food Be the Only Color

    What: keep every organizer neutral so the produce is what you notice. How: clear containers, white or black labels, at most one wood or rattan accent — nothing patterned or brightly colored. Why: this is a look decision, not a function one, but it’s why aesthetic fridges photograph so well — your eye lands on the strawberries, not the packaging.

    14. Don’t Pack It to the Edges

    What: leave deliberate empty space on every shelf. How: aim for shelves about three-quarters full; if a bin is overflowing it needs a bigger bin or fewer items, not more stacking. Why: air has to circulate for the fridge to hold an even temperature, so an overpacked fridge is messier and less efficient.

    15. Build a System, Not a Photo

    What: optimize for something you can keep up in five minutes a week, not something perfect for one picture. How: every time you unload groceries, do a quick pass — toss what’s gone off, wipe one spill, put strays back in their zone. Tip: if part of the system keeps failing, that’s information — adjust the bin, the label or the category instead of forcing it.

    Organized refrigerator divided into five practical zones for drinks, produce, meals and everyday foods
    Organized refrigerator divided into clear zones for beverages, dairy, produce, snacks, and greens
    Organized refrigerator shelf with labeled meal-prep containers and ready-to-eat foods
    Organized refrigerator shelf with labeled meal prep containers, cooked proteins, grains, vegetables, and ready-to-eat meals

    The Simple Formula for a Fridge Organization Aesthetic

    If you remember nothing else, remember this order:

    • Clean everything out first.
    • Categorize similar foods together.
    • Contain loose items in matching organizers.
    • Label only what will genuinely help.
    • Leave a little empty space on every shelf.
    • Maintain the system for a few minutes each week.

    A beautifully organized fridge doesn’t need a luxury kitchen or expensive products — just a few thoughtfully chosen containers and a little consistency. Start with one shelf or one category at a time, and remember: the prettiest fridge isn’t the one with the most organizers, it’s the one that works for your lifestyle.

    What to Buy: Fridge Organizers Worth It

    You don’t need a full matching set on day one. Buy for your messiest zone first and add pieces over time. The categories that earn their shelf space:

    • Clear fridge bins — open-top baskets that group packaged food by category; measure shelf height and depth first.
    • A lazy Susan — a turntable for the sauces and small jars that get lost at the back of a shelf.
    • A drink organizer — a can dispenser or tiered rack that turns a wasted shelf into a tidy drink station.
    • Produce containers — vented, with a drainage insert, to keep berries and greens fresh in the drawers.
    • An egg holder — a low tray that replaces the carton and lets you see your count at a glance.
    • A label maker — for short, condensation-proof labels that keep the system going when others use the fridge.
    • Meal-prep containers — a matching set for a dedicated prep shelf; glass for reheating, plastic for portability.

    For organizers for the rest of the kitchen — cabinets, drawers and the pantry — see our guide to Amazon kitchen organization products that actually save space. The same clean-contain-label approach works everywhere; our roundup of home organization products you’ll actually use has the picks.

    Fridge organization flat lay with clear bins, food containers, labels, lazy Susan, egg holder and meal-prep containers

    Frequently Asked Questions

    How do I organize my fridge on a budget?

    Start with a full clean-out — that alone makes the fridge look most of the way there — then add a few clear bins for your messiest shelf. Build a matching set over months; you don’t need it all at once.

    What are the best containers for fridge organization?

    Use two types for two jobs: open clear bins to group packaged food, and airtight containers to decant loose or messy-packaged food like deli meat and cheese. For fruit and vegetables, use vented produce containers — they let air move, so berries and greens last longer.

    How do I keep my fridge organized long-term?

    Give every category a fixed zone, label lightly, and do a five-minute pass each week when you put groceries away. That weekly-pass habit is what keeps our 20 bathroom organization ideas working too — the maintenance matters more than the setup.

    Where should I store eggs, milk and produce?

    Eggs and dairy belong on a middle shelf, not the door, which is the warmest part and swings in temperature. Produce goes in the crisper drawers, raw meat on the bottom shelf, condiments in the door.

    Is an aesthetic fridge actually worth the effort?

    The look is a side effect; the real payoff is less food waste and faster meals, because you can see what you have. Aim for a system that works in real life rather than a fridge that photographs well once.

  • 10 Easy Ways to Transition Your Home Decor from Summer to Fall

    10 Easy Ways to Transition Your Home Decor from Summer to Fall

    Home Finds Studio is a participant in the Amazon Services LLC Associates Program. As an Amazon Associate, we earn from qualifying purchases — at no extra cost to you. We only feature products we genuinely love.

    Small, thoughtful updates to make your home feel warm and cozy as the season changes — no full redecorating required.

    Swap Bright Colors for Warm Earth Tones

    Swap Bright Colors for Warm Earth Tones

    One of the easiest changes you can make is introducing warmer shades like terracotta, camel, olive green, rust, and soft beige. These colors instantly make a room feel more inviting while still keeping a clean, modern look.

    A few terracotta throw pillows can completely transform your sofa without overwhelming the space.

    Add Cozy Texture with Lightweight Throws

    Add Cozy Texture with Lightweight Throws

    Instead of reaching for heavy winter blankets, start with lightweight knitted throws. They add softness and warmth while keeping your living room feeling comfortable during those in-between weeks.

    Drape one casually over your couch or favorite chair for an effortless seasonal update.

    Update Your Coffee Table Styling

    Update Your Coffee Table Styling

    Refresh your coffee table by replacing bright summer accessories with neutral decorative pieces. Stack a couple of coffee table books, add a ceramic vase, and include a small tray for candles or decorative beads.

    Keeping the styling simple helps your home feel calm and timeless.

    Decorate with Natural Elements

    Decorate with Natural Elements

    Nature offers the perfect inspiration during seasonal changes. Fill a bowl with pinecones, dried wheat, acorns, branches, or eucalyptus stems for an elegant and inexpensive centerpiece.

    These small organic touches make your home feel connected to the season without looking overly decorated.

    Keep It Minimal

    Keep It Minimal

    One of the biggest decorating mistakes is trying to display every fall decoration at once. Instead, choose a few intentional pieces and let them stand out.

    A simple vase, a couple of cozy pillows, and a softly scented candle often create a more elegant result than filling every surface with decorations.

    Layer Neutral Textiles

    Layer Neutral Textiles

    Early fall isn’t about heavy fabrics yet. Mix linen, cotton, and soft knit textures in neutral shades to create depth without making the room feel dark.

    Adding a neutral knit blanket or textured cushion instantly makes your space feel warmer while maintaining a light aesthetic.

    Replace Summer Scents with Warm, Soft Fragrances

    Replace Summer Scents with Warm, Soft Fragrances

    Our homes should feel cozy in every way—including how they smell. Swap citrus or tropical fragrances for gentle scents like vanilla, amber, sandalwood, cinnamon, or soft pumpkin blends.

    A warm scented candle instantly creates that welcoming early fall atmosphere.

    Refresh Your Entryway

    Refresh Your Entryway

    Your entryway sets the tone for the entire home. Swap bright floral arrangements for dried stems, add a woven basket for shoes or blankets, and include a small seasonal accent on your console table.

    A welcoming entrance creates a cozy first impression.

    Introduce Warm Lighting

    Introduce Warm Lighting

    As evenings become shorter, lighting becomes more important. Replace cool white bulbs with warm white lighting and use table lamps during the evening instead of relying only on ceiling lights.

    Soft lighting creates a relaxing atmosphere that feels perfect for early fall.

    Style with Wood and Woven Accents

    Style with Wood and Woven Accents

    Natural wood, wicker, and woven textures bridge the gap between summer and autumn beautifully. Think decorative trays, baskets, small stools, or wooden candle holders.

    These materials add warmth without making your decor feel too seasonal.

    Ready to give your home a cozy fall refresh? Explore my Seasonal Transition collection in my Amazon Storefront for cozy neutral textiles, soft candles, and lightweight throws that make the transition simple.

    Creating a beautiful summer to fall home decor transition doesn’t require a complete makeover. Small, thoughtful updates can completely change how your home feels while helping you enjoy the changing season at your own pace.

    Start with one small change, a few warm-toned pillows or a single lightweight throw, and layer in the rest at your own pace. For a room-by-room walkthrough of the same look, see our 25 late summer home decor ideas, and when you are ready to make the bedroom just as cozy, try these cozy fall bedroom ideas.